Creality K1C and K2 Pro Extrusion and Resonance Fixes

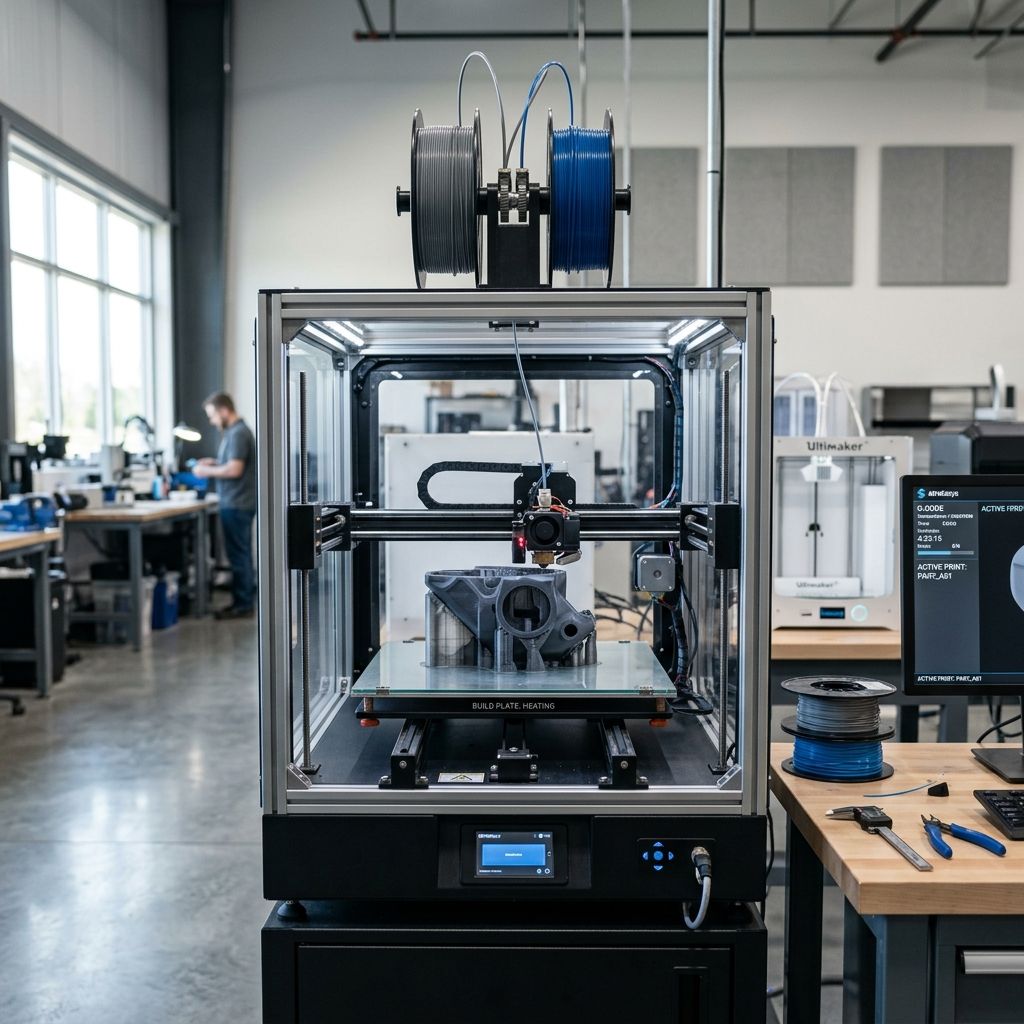
Creality K1C & K2 Pro Field Troubleshooting: Extrusion Skips and CoreXY Tuning
Solve all-metal Unicorn nozzle heat creep jams, eliminate diagonal ringing artifacts with belt resonance tuning, and prevent high-acceleration gantry racking.
Workshop Diagnostic Summary & CoreXY Baseline
The Creality K1C and K2 Pro represent high-speed enclosed CoreXY platforms engineered for carbon-fiber composites and engineering filaments. However, operating these enclosed machines at accelerations exceeding 15,000 mm/s² exposes distinct mechanical stress points: thermal heat creep in the integrated bimetallic Unicorn nozzle when printing low-glass-transition PLA, motor harmonic excitation across unequal belt paths, and lead screw racking during dynamic Z-hops. To benchmark your maximum volumetric throughput before running into extruder motor grinding, use our Flow Rate Calculator to match layer heights and print speeds to your hotend melt zone capacity.
Issue 1: All-Metal Unicorn Nozzle Heat Creep & Enclosed Chamber Filament Swelling
The Unicorn nozzle architecture combines a hardened steel tip integrated into a titanium-copper alloy heatbreak throat tube extending directly into the extruder heatsink. While this eliminates conventional PTFE degradation and prevents hotend gap leakage between separate nozzles and throat tubes, the shortened heatbreak thermal transition zone becomes acutely vulnerable to thermal heat creep when printing standard PLA or PETG inside a sealed enclosure.
When the printer lid and front glass door remain closed during long print jobs, internal chamber temperatures quickly rise past 42°C. Standard polylactic acid (PLA) has a glass transition temperature (T_g) between 55°C and 60°C. Under sustained radiant heat from the 60°C heated bed and radiant heatsink dissipation, the filament reaches its softening point inside the cold block throat before entering the melt chamber. As the dual-gear extruder pushes softened filament downward, radial swelling occurs, creating an immovable mechanical plug against the titanium throat walls.
The physics of this thermal failure can be examined through Fourier's Law of One-Dimensional Heat Conduction along the heatbreak wall:
q = -k · A · (dT / dx) ≈ k · A · (T_hotend - T_heatsink) / L_transition
Where:
- q: Conductive heat transfer rate into the cold zone (Watts).
- k: Thermal conductivity of the heatbreak alloy (W/m·K). Titanium alloy exhibits low conductivity (≈ 7.5 W/m·K), while copper throat sleeves conduct significantly higher heat (≈ 380 W/m·K).
- A: Cross-sectional annular area of the metal throat tube (m²).
- T_hotend: Nozzle melt temperature (e.g., 220°C / 493 K).
- T_heatsink: Heatsink equilibrium temperature (target ≤ 45°C / 318 K).
- L_transition: Effective length of the thermal break barrier (meters).
In standard workshop conditions where chamber ambient temperatures rise to 45°C, the heatsink cooling fan (3010 axial fan) circulates warm air with reduced cooling capacity (\(Delta T\) between heatsink fins and air drops from 25°C down to barely 5°C). Consequently, \(T_{heatsink}\) crosses the 52°C threshold, triggering rapid filament deformation. Similar enclosure thermal management challenges are common across high-speed enclosed machines; see our diagnostic analysis in the QIDI Plus 4 & X-Max 3 Heat Creep Troubleshooting guide for comparative thermal dissipation strategies.
- Chamber Ventilation Protocol: When printing PLA, TPU, or standard PETG on the K1C or K2 Pro, always remove the top glass lid and leave the front door unlatched. Enable the rear chamber exhaust auxiliary fan at 70% duty cycle to draw warm air out of the enclosure.
- Heatsink Thermal Paste Reapplication: Disassemble the hotend assembly and inspect the cylindrical upper mounting neck of the Unicorn nozzle. Clean off dried factory silicone paste and apply a high-temperature non-conductive thermal compound (such as boron nitride paste or Thermal Grizzly Kryonaut, rated up to 350°C) exclusively on the heatsink contact cylinder. Never get paste inside the filament pathway or on the heater block.
- Extruder Tension Lever Adjustment: The K1C compact dual-gear extruder incorporates a preloaded spring arm. If the tension screw is over-tightened, gear teeth bite too deeply into PLA, flattening round 1.75 mm filament into a 1.95 mm oval that binds inside the heatbreak. Back out the extruder tension set screw by 1.5 turns until tooth indentation measures approximately 0.08 mm.
- Retraction Distance Capping: Cap retraction distances at 0.6 mm to 0.8 mm maximum. Long retractions (>1.2 mm) pull molten plastic upward past the thermal transition break line, depositing liquid polymer onto the cold titanium throat where it instantly freezes into a plug.
Issue 2: CoreXY Belt Tension Resonance & High-Frequency VFA Diagonal Ringing
The CoreXY kinematic motion system on the K1C and K2 Pro utilizes two continuous 6 mm wide fiberglass-reinforced neoprene rubber timing belts (Belt A and Belt B) routed across a series of idler pulleys and gantry corner brackets. At high print speeds (300 mm/s to 600 mm/s) and accelerations above 12,000 mm/s², small tension discrepancies between the two belt loops introduce asymmetric transverse compliance.
When the toolhead accelerates along a 45-degree diagonal axis (where only one stepper motor is actively driving motion), an unevenly tensioned opposing belt acts as a non-linear spring, producing high-frequency vertical fine artifacts (VFAs) and ghosting ripples along vertical walls. To eliminate VFAs, technicians must equalize both belts to a precise natural acoustic frequency.
The natural fundamental frequency of a tensioned belt span is governed by Mersenne's Law for vibrating strings:
f = (1 / (2 · L)) · √(T / μ)
Where:
- f: Fundamental acoustic resonance frequency in Hertz (Hz).
- L: Unsupported free span length of the timing belt in meters (m).
- T: Tension force applied along the belt in Newtons (N).
- μ: Linear mass density of the belt material (kg/m). For standard Gates 2GT-6mm neoprene belts, \(mu approx 0.009 ext{ kg/m}\).
Rearranging the equation to solve for required belt tension \(T\):
T = 4 · L^2 · f^2 · μ
On the K1C and K2 Pro chassis, move the toolhead to the front-center position. This establishes an unsupported rear belt span length \(L = 165 \text{ mm}\) (0.165 m) between the rear corner idler pulley and the gantry carriage clamp. Creality Klipper firmware is optimized for a target resonance frequency \(f = 110 \text{ Hz}\).
Calculating the target mechanical tension:
T = 4 · (0.165)^2 · (110)^2 · 0.009
T = 4 · 0.027225 · 12,100 · 0.009 ≈ 11.87 \text{ Newtons}
A tension of 11.87 N represents approximately 1.21 kgf of tensile load per belt. If one belt measures 95 Hz (8.8 N) while the other measures 125 Hz (15.3 N), the gantry experiences an uneven 6.5 N transverse torsional moment, causing the carriage to yaw during high-speed directional reversals.
- Acoustic Tuning Procedure: Install a guitar tuner or audio spectrum analyzer application on your mobile device. Place the microphone 25 mm above the center of the rear 165 mm belt span. Pluck the belt like a guitar string. Adjust the rear spring tensioner screws until both Left (Belt A) and Right (Belt B) belts register within ±2 Hz of 110 Hz.
- Idler Pulley Bearing Alignment: Inspect the toothed and smooth idler pulleys on the rear tension brackets. If belt teeth ride against the pulley flanged rim, excessive friction produces a cyclic squeaking noise and belt edge fraying. Loosen the idler shaft shoulder bolt, adjust vertical shim spacing, and torque to 1.8 N·m.
- Input Shaper Accelerometer Recalibration: Once belts are balanced, open the Creality Web Dashboard / Fluidd interface and initiate an Input Shaper sweep. Run
SHAPER_CALIBRATE AXIS=XandSHAPER_CALIBRATE AXIS=Y. Ensure the recommended shaper filter (typically MZV or EI) reports vibration reduction greater than 92% with recommended acceleration limits above 10,000 mm/s².
For additional hardware calibration tips and motor alignment checks on related Creality platforms, consult our maintenance breakdown on Common Ender 3 V3 Problems and Fixes.
Issue 3: High-Acceleration Z-Hop Racking and Top Surface Scratching
The K1C and K2 Pro utilize dual or triple synchronized lead screws driven via closed-loop timing belts. During aggressive travel moves featuring Z-hops (especially when slicing with 0.4 mm retraction Z-hop at 12,000 mm/s² gantry acceleration), torsional backlash and slight lead screw non-coaxiality induce momentary gantry tilt (racking). As the toolhead rapidly drops back down, the hardened Unicorn nozzle tip drags across freshly deposited top solid infill, leaving noticeable diagonal gouges and scoring.
Follow this multi-step alignment protocol to eliminate gantry racking and nozzle dragging:
| Subsystem Component | Inspection Point | Nominal Alignment Spec | Field Adjustment / Workshop Action |
|---|---|---|---|
| Z-Axis Lead Screws (T8x8) | Axial runout & brass nut wear | Runout < 0.03 mm along 300 mm | Loosen lead screw POM nut screws by 1/4 turn to allow self-centering |
| Z-Sync Timing Belt | Bottom loop tension | Deflection 4 mm under 200g force | Adjust idler bearing block; eliminate slack between dual motor pulleys |
| Gantry Bed Level Differential | Mesh bed variance (Tilt) | Max bed variance < 0.15 mm | Perform manual corner standoff shim adjustments before auto-meshing |
| Nozzle Z-Offset Drift | Strain gauge tare sensor | Z-offset repeatable to ± 0.01 mm | Clean underside of nozzle tip before probing; remove charred plastic |
| Slicer Z-Hop Profile | Travel move parameters | Slope Z-hop (Spiral lift) | Switch from traditional vertical hop to 0.2mm spiral lift in slicer |
- Lead Screw POM Anti-Backlash Nut De-Binding: The POM nuts securing the bed gantry to the vertical lead screws are frequently over-torqued from the factory. If the two M3 mounting screws are completely rigid, any minor lead screw curvature forces the entire cantilevered bed frame to rock laterally. Loosen each POM nut mounting screw by 90 degrees. This provides 0.05 mm of floating radial compliance while maintaining strict vertical constraint.
- Manual Bed Tramming via Gantry Blocks: Power off the printer. Place two identical 100 mm aluminum 1-2-3 machinist blocks or precision calibration cylinders directly onto the bottom chassis beneath the left and right gantry crossbars. Manually rotate the Z-axis lead screws until both sides rest evenly on the reference blocks with identical contact resistance. Re-engage the bottom sync belt lock tensioner.
- Slicer Travel Move Optimization: In Creality Print, OrcaSlicer, or PrusaSlicer, enable 'Avoid Crossing Perimeters' and set 'Z-Hop Type' to 'Spiral' or 'Slope'. Traditional vertical Z-hops produce nozzle pressure spikes that drool tiny molten pimples during retraction, which the nozzle collides with on subsequent layers. Slope Z-hops raise the toolhead dynamically along the travel vector, eliminating dragging marks.
If you operate multiple high-speed manufacturing printers across your shop floor, compare these motion calibration procedures with our setup protocols in Bambu Lab X1-Carbon & X1E First Setup Tips to standardize bed tramming across different enclosed platforms.
Preventive Maintenance & Inspection Schedule for Creality K-Series
To sustain round-the-clock reliability on production K1C and K2 Pro units, enforce this routine shop floor maintenance schedule:
- Every 50 Operating Hours: Wipe down X-axis carbon rod tubes and Y-axis hardened steel linear rods with a lint-free microfiber cloth moistened with 99% isopropyl alcohol. Never apply grease or wet lubricant to carbon rods; carbon rods operate dry on self-lubricating bronze bushing sleeves.
- Every 150 Operating Hours: Inspect CoreXY belt teeth for nylon jacket abrasion and rubber shedding. Re-check belt acoustic frequency (110 Hz). Clean lead screws with a soft nylon brush and apply synthetic PTFE grease.
- Every 300 Operating Hours: Remove extruder assembly cover. Blow out carbon fiber dust and filament shavings from the dual drive gears using dry compressed air. Inspect the hardened steel teeth for wear or chipped flutes.
- Quarterly: Clean the chamber carbon air filter, verify exhaust fan airflow, check electrical terminal screws on the power supply unit (PSU) and heated bed terminal block for tightness (torque to 1.2 N·m).
Frequently Asked Questions
Why does my Creality K1C hotend jam specifically when printing standard PLA?
Heat creep occurs because enclosed chamber temperatures exceed 40°C, softening PLA filament inside the cold-side heatbreak throat before it reaches the melt zone; remove the top lid and open the front door when printing low-temp filaments.
What is the correct acoustic frequency for tuning CoreXY belts on the K1C and K2 Pro?
Tune both Belt A and Belt B to 110 Hz (±2 Hz) across the rear 165 mm unsupported span when the printhead is centered against the front gantry rail.
Can I apply grease or lubricant to the K1C carbon fiber X-axis rods?
No, carbon fiber rods must remain completely dry and clean; applying grease attracts abrasive filament dust and clogs the self-lubricating dry graphite bushings.
How do I stop the nozzle from scraping printed top surfaces during rapid travel moves?
Loosen the Z-axis POM lead screw nuts by a quarter-turn to prevent binding, tram the bed gantry with reference blocks, and configure your slicer to use spiral or slope Z-hops instead of standard vertical lifts.
Thermal Runaway & Enclosure Exhaust Warning
CAUTION: When printing engineering polymers (such as PA-CF, PC, or PPS) requiring bed temperatures above 100°C and nozzle temperatures above 280°C, inspect the silicone heater block insulation sock before every print run. A torn or missing silicone sock allows auxiliary cooling fans to chill the heater block directly, triggering thermal runaway safety halts (Error Code 2000). Always ensure the enclosure exhaust filter is seated properly to scrub hazardous ultrafine particles (UFPs) generated during composite filament extrusion.
Related Intel
Creality K1 SE Common Problems and Workshop Fixes
Solve Creality K1 SE common problems including CoreXY belt tension imbalance, Unicorn nozzle heat creep, extruder gear grinding, and strain gauge leveling drift with practical workshop protocols.
Elegoo Centauri Carbon Workshop Troubleshooting Guide
Troubleshoot Elegoo Centauri Carbon failures with practical workshop solutions for acoustic CoreXY belt tuning, accelerometer sensor drift, and extruder gear wear.
Elegoo Centauri Carbon Wear Parts Replacement Guide
Industrial maintenance guide for the Elegoo Centauri Carbon: precise replacement intervals, torque specs, and teardown steps for hardened nozzles, drive gears, and CoreXY belts.