Creality K1 SE Common Problems and Workshop Fixes

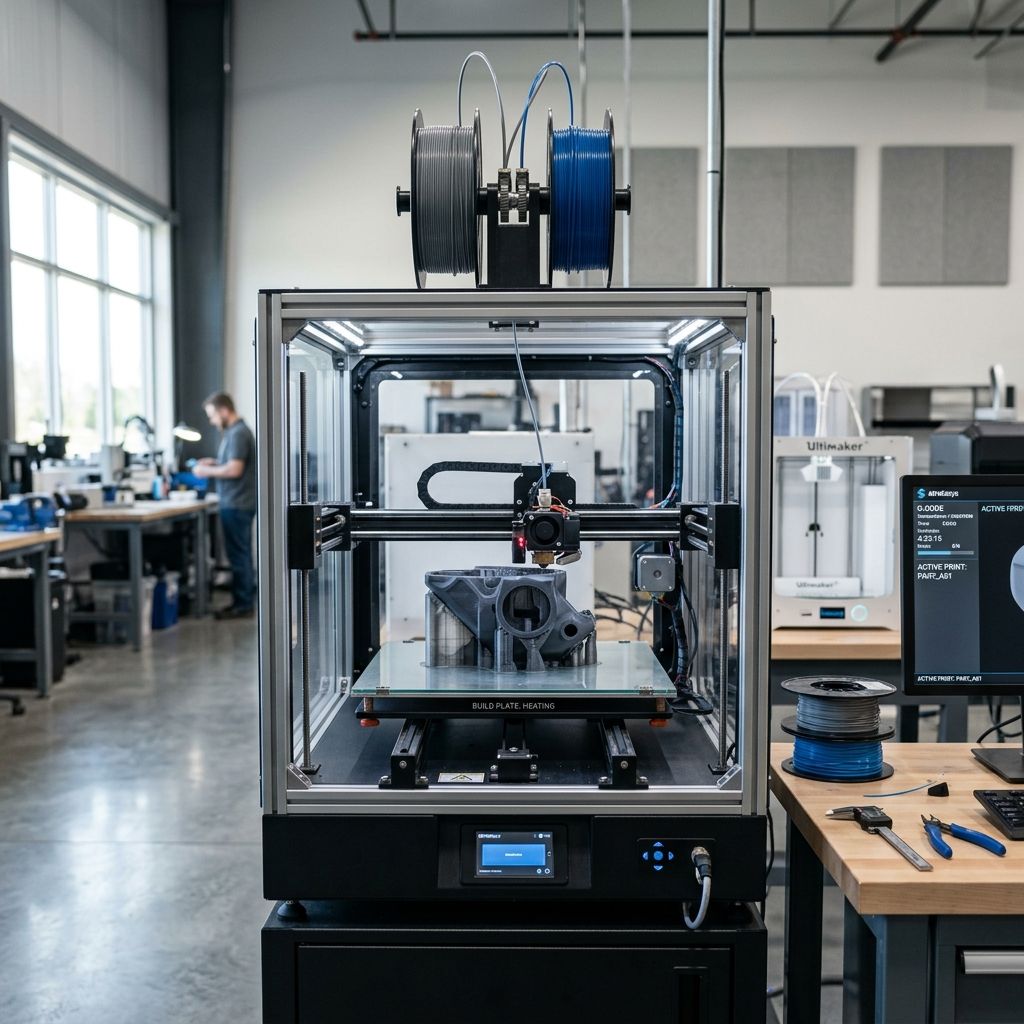
Creality K1 SE Common Problems and Field Diagnostic Protocols
Direct mechanical solutions for extrusion stalls, CoreXY belt imbalance, strain gauge leveling drift, and thermal management on the open-frame K1 architecture.
Engineering Overview & Diagnostics
The Creality K1 SE strips down the flagship K1 enclosure while retaining the high-acceleration CoreXY kinematics and dual-gear direct extruder. Operating without a heated chamber alters the thermal boundary layer across the heatsink, while unconstrained frame harmonics shift resonant frequencies. If you are diagnosing print quality defects or extrusion instability, our 3D Printer Troubleshooting tool provides direct diagnostic matrices tailored to high-speed CoreXY platforms.
CoreXY Kinematics: Belt Frequency Tuning and Diagonal Ringing
On high-speed platforms utilizing dual stepper motors to drive combined X/Y gantry motions, belt tension symmetry is critical. The K1 SE uses 6mm GT2 neoprene belts with fiberglass reinforcement. When tension between Belt A (left motor) and Belt B (right motor) deviates by more than 8%, the gantry racks microscopically under accelerations exceeding 8,000 mm/s². This racking translates directly to asymmetrical ghosting patterns visible exclusively on 45-degree angled perimeter walls.
Rather than relying on subjective spring-loaded tensioner subjective feel, shop mechanics must measure belt resonance frequency across an unsupported span. Pluck the belt midway across the rear gantry beam while the toolhead is pinned at the front-center position (measuring an unsupported span length $L = 0.155\text{ m}$). The natural frequency $f$ relates to belt tension $T$ via the transverse wave equation for a taut string:
$$f = \frac{1}{2L} \sqrt{\frac{T}{\mu}}$$
Where $\mu$ is the linear mass density of the GT2 6mm belt (approximately $0.0084\text{ kg/m}$ for standard fiberglass-reinforced rubber), $L$ is the vibrating span in meters, and $T$ is the static tension in Newtons. Solving for desired tension:
$$T = 4 \cdot \mu \cdot L^2 \cdot f^2$$
For an optimal operating tension of $18.5\text{ N}$ to prevent tooth hopping while avoiding bearing overload, target a resonance frequency between $110\text{ Hz}$ and $115\text{ Hz}$. If your acoustic analysis yields $90\text{ Hz}$ on Belt A and $125\text{ Hz}$ on Belt B, loosen the locking bolts on the rear idler bracket and adjust the tensioning screws until both belts register within $2\text{ Hz}$ of each other. Similar resonance issues can also be observed when maintaining other high-speed platforms, as detailed in our analysis of Common Problems and Fixes for Creality K2 Pro & K1C.
Extruder Drive Grinding and Secondary Gear Runout
The direct-drive assembly on the K1 SE utilizes dual hardened steel gears with a 3.5:1 reduction ratio. A frequent failure mode involves filament grinding during repetitive retraction cycles, particularly on flexible filaments like TPU or brittle engineering polymers. In workshop teardowns, the primary cause is secondary gear shaft misalignment causing axial runout exceeding 0.05mm.
When the tension lever spring is overly compressed, the idler gear exerts excessive radial force against the motor drive shaft. This causes localized filament flattening, widening standard 1.75mm filament to 1.92mm in the melt zone entry. The swollen filament then encounters the upper boundary of the copper-titanium bimetallic heatbreak, inducing immediate mechanical jams.
- Primary Symptom: Audible clicking from the toolhead during travel retractions followed by total underextrusion.
- Root Cause: Excessive spring preload on idler arm causing filament ovality and hobbed gear clogging.
- Dimensional Tolerance: Maximum allowable filament width deviation after drive hobbing is 0.08mm.
- Recommended Torque: Tighten the extruder tension adjustment grub screw until the spring compresses to exactly 8.2mm overall length.
- Maintenance Interval: Inspect drive gear teeth every 120 print hours; clear brass or polymer dust with a nylon bristle brush.
Unicorn Quick-Swap Nozzle Thermal Creep and Seal Integrity
The K1 SE integrates the Unicorn all-metal nozzle design, featuring an extended heatbreak with an integrated copper alloy tip and titanium alloy throat. While this eliminates leakage between the nozzle face and heatblock threads, thermal creep remains a challenge when running standard PLA with the bed maintained above 55°C in unventilated workshops.
Unlike fully enclosed machines that require passive door cracking, the K1 SE dissipates heat freely from the build plate. However, the 3010 axial cooling fan on the cold block delivers an airflow volume of roughly 2.8 CFM. When ambient workshop temperatures exceed 28°C, the cooling fin temperature can surpass 48°C. This softens low-glass-transition polymers before they reach the transition zone. If your production environment processes abrasive composites such as carbon fiber or glass-filled nylon, refer to our Hardened Nozzle Guide for Abrasive Filaments to assess wear mechanics on integrated nozzle geometries.
| Filament Type | Glass Transition (Tg) | Max Heatsink Temp | Extrusion Speed Limit | Purge Volumetric Flow |
|---|---|---|---|---|
| Standard PLA | 58°C - 62°C | 42°C | 350 mm/s | 22 mm³/s |
| High-Speed PETG | 78°C - 82°C | 54°C | 280 mm/s | 26 mm³/s |
| ABS / ASA (Draft Protected) | 102°C - 105°C | 70°C | 300 mm/s | 28 mm³/s |
| PA-CF (Polyamide Carbon Fiber) | 140°C - 150°C | 85°C | 220 mm/s | 30 mm³/s |
| TPU 95A | -20°C (Flexible) | 38°C | 60 mm/s | 11 mm³/s |
Strain Gauge Bed Leveling Drift and Z-Offset Variations
Bed tramming on the K1 SE relies on four piezoelectric strain gauge sensors located underneath the heated bed support plate. During the pre-print routine, the nozzle taps the build surface at multiple points to construct a height mesh without requiring an auxiliary inductive or optical probe. However, mechanical pre-stress in the bed mounting screws frequently leads to sensor hysteresis.
If the bed springs or rigid spacers are torqued unevenly, the bed plate warps as it transitions from 25°C to 60°C. Thermal expansion of aluminum ($23 \times 10^{-6}\text{ K}^{-1}$) produces bowing across the 220x220mm surface. When the nozzle taps a pre-stressed sensor corner, the trigger threshold registers premature contact, resulting in an artificial offset deviation between 0.08mm and 0.18mm across diagonal corners.
- Sensor Drift Origin: Accumulated plastic residue on nozzle tip cushioning physical touch contact.
- Leveling Protocol: Clean the nozzle tip at 200°C using brass wool before commencing bed probing.
- Thermal Soak Requirement: Allow the heatbed to stabilize at target temperature for minimum 8 minutes prior to meshing.
- Mesh Tolerance Target: Peak-to-valley variance across the entire build plate must remain under 0.25mm.
Z-Axis Lead Screw Racking and Layer Banding
The vertical motion on the K1 SE is actuated via triple Z lead screws linked underneath the base chassis with a closed-loop timing belt. A common workshop complaint is periodic horizontal ribbing repeating at 8.0mm intervals—matching the lead screw pitch. When the bottom synchronization belt skips teeth during shipping or accidental manual bed depression, the three lead screws fall out of phase.
To resolve lead screw synchronization errors, decouple the bottom tensioner pulley. Use two precision-machined 100mm gauge blocks placed between the gantry crossmembers and the bed carriage. Lower the bed manually until both sides seat flush against the gauge blocks, ensuring parallel alignment within 0.02mm. Re-engage the timing belt and tighten the idler bracket to eliminate backlash.
Input Shaping Acceleration Limits and Resonance Calibration
The K1 SE utilizes Klipper-based Creality OS, allowing resonance compensation through an integrated or USB-connected ADXL345 accelerometer. Workshop technicians often run the automated shaper calibration once and never revisit the profiles. Over 200 hours of high-speed printing, belt relaxation and carriage guide rail wear degrade the compensation profile, causing ringing to reappear at frequencies between 45 Hz and 65 Hz.
When reviewing your generated resonance graphs, check the damping ratio. If the shaper algorithm selects an aggressive filter such as 3HUMP_EI to compensate for excessive mechanical slop, the system penalizes corner sharpness and limits usable maximum acceleration to under 5,000 mm/s². Addressing the physical source of vibration—tightening carriage linear rod set screws and adjusting belt tension—allows the system to select MZV or EI filters, unlocking accelerations up to 12,000 mm/s² without corner bulging.
- Recommended Shaper Model: MZV (Minimum Zero Vibration) for clean corner transitions.
- Target Accelerations: 8,000 to 10,000 mm/s² on inner walls; 4,000 to 5,000 mm/s² on outer perimeters.
- Linear Rail Lubrication: Lithium soap-based grease NLGI Grade 2 applied directly to carriage bearing balls every 300 operating hours.
- Motor Temperature Threshold: Stepper motor casing temperature must not exceed 75°C during continuous 8-hour production runs.
Frequently Asked Questions
Why does my Creality K1 SE nozzle clog after 40 minutes of printing standard PLA?
Thermal creep softens the filament in the upper cold zone of the Unicorn nozzle when ambient room air is stagnant or heatsink airflow is restricted, causing the filament to expand before entering the melt block.
How do I correct diagonal ghosting on 45-degree angled walls?
Measure the acoustic frequency of both CoreXY belts and adjust the rear tensioner bolts until both belts resonate symmetrically at approximately 110 Hz across a 155mm span.
What causes the first layer to be too close on one side of the build plate?
Thermal expansion warping without sufficient soak time causes the strain gauge sensors to register inconsistent touch thresholds; heat the bed for 8 minutes before executing auto-bed leveling.
How frequently should the K1 SE Z-axis lead screws be lubricated?
Clean the three lead screws with isopropyl alcohol and re-lubricate with PTFE-infused synthetic grease every 150 printing hours to prevent pitch-related layer banding.
Critical Workshop Safety and Torque Protocol
Never torque the Unicorn nozzle assembly while cold. Cold disassembly risks shearing the thin-walled titanium heatbreak throat inside the heatsink bore, requiring full replacement of the printhead sub-assembly. Always heat the hotend to 240°C before applying counter-torque with an 8mm open wrench on the heater block and a 6mm socket on the nozzle hex flats. Limit applied torque to 1.8 N·m to preserve copper threading integrity.
Related Intel
Elegoo Centauri Carbon Workshop Troubleshooting Guide
Troubleshoot Elegoo Centauri Carbon failures with practical workshop solutions for acoustic CoreXY belt tuning, accelerometer sensor drift, and extruder gear wear.
Elegoo Centauri Carbon Wear Parts Replacement Guide
Industrial maintenance guide for the Elegoo Centauri Carbon: precise replacement intervals, torque specs, and teardown steps for hardened nozzles, drive gears, and CoreXY belts.
QIDI Plus 4 vs X-Max 3: Shop Comparison and ROI
The QIDI Plus 4 introduces a dual-heater 65°C chamber and 305x305x280mm volume, whereas the older X-Max 3 delivers a larger 325x325x315mm envelope but suffers from slower chamber ramp rates and bulkier gantry mass.