UniFormation GKTwo 12K Maintenance and Tuning Guide

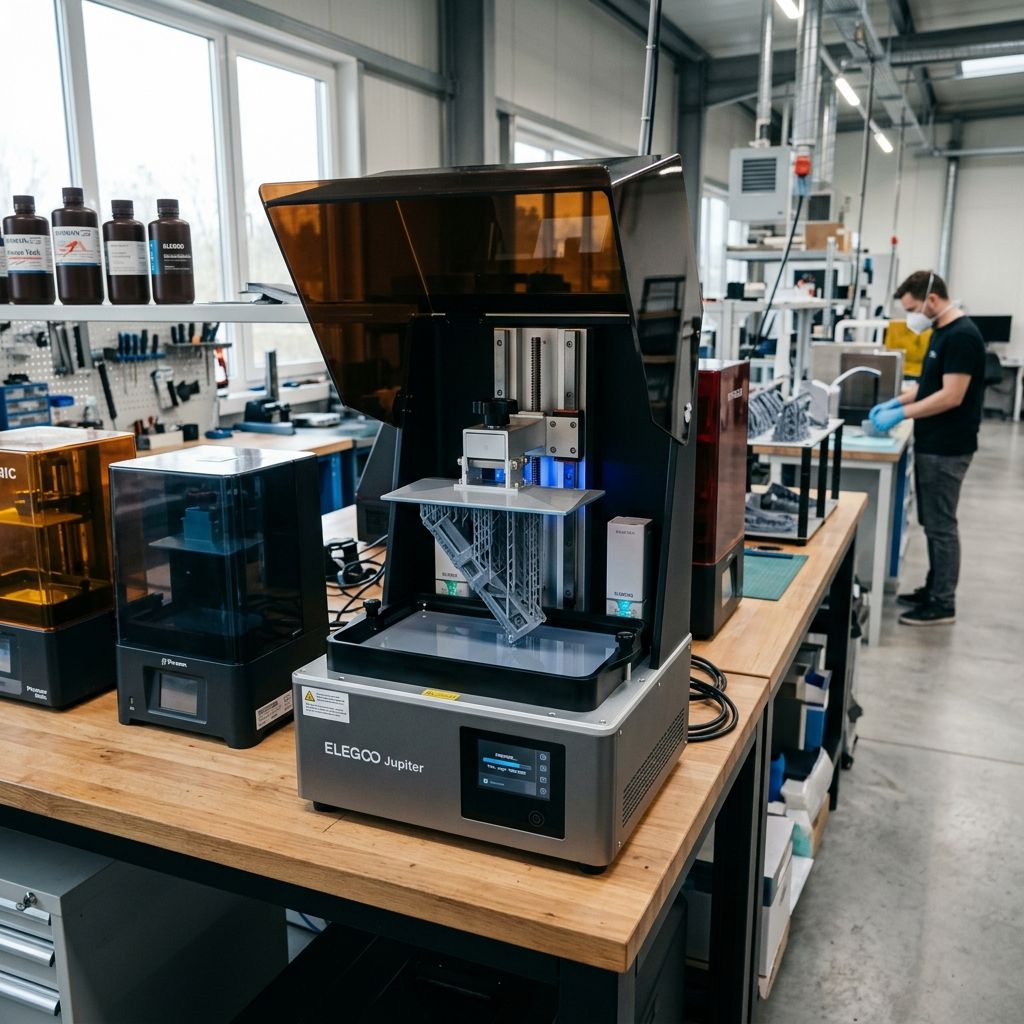
UniFormation GKTwo 12K Shop Maintenance & Thermal Optimization
Keep your 12K monochrome resin engine running without vat heater failures, Z-axis binding, or LCD thermal degradation under high-duty cycle workshop conditions.
Engineering Baseline & Service Parameters
The UniFormation GKTwo 12K is a heavy-duty production workhorse featuring an integrated PTC ceramic chamber heating element, a 10.3-inch 12K mono LCD (8520 x 4320 resolution, 29.7 µm XY precision), and dual linear rails driven by an anti-backlash T-lead screw. Operating this machine reliably in a manufacturing environment requires strict thermal discipline, mechanical alignment tolerances within 15 microns, and scheduled chemical decontamination. For step-by-step triage on broader hardware failures, consult our interactive 3D Printer Troubleshooting tool to diagnose layer shift and adhesion anomalies.
The PTC Ceramic Vat Heating System: Diagnostics, Resistance, and Thermal Drift
Unlike standard desktop MSLA units that rely solely on ambient room heating or external enclosure tents, the GKTwo integrates a positive temperature coefficient (PTC) ceramic air heater paired with a circulating blower fan adjacent to the vat reservoir. In production workshops running technical resins (such as polyurethane-like resins, tough engineering photopolymers, or high-viscosity dental models), resin viscosity spikes dramatically below 25°C. At 18°C, standard photopolymer resin exhibits nearly triple the dynamic viscosity compared to its 30°C baseline, resulting in severe suction forces, delamination, and incomplete cavity refill during retraction.
The GKTwo heater controller operates via a closed-loop NTC 100k thermistor embedded near the heating duct. However, field units frequently report thermal drift or error codes when resin vapor condenses on the thermistor bead or when the centrifugal fan accumulates airborne photopolymer particulate. When inspecting a heater failure or thermal shutdown:
- PTC Element Resistance: Measure across the ceramic element terminals with a digital multimeter. A healthy 24V / 120W PTC heater reads between 4.8 Ω and 5.4 Ω at 22°C ambient. A reading below 2.0 Ω indicates shorting across ceramic plates; infinite resistance (OL) confirms a blown thermal cutoff fuse.
- NTC Thermistor Calibration: Disconnect the 2-pin JST thermistor header from the mainboard. Resistance should measure 100 kΩ ± 1% at 25°C (B-constant 3950). If the machine registers 60°C while the chamber is cold, the thermistor circuit has experienced partial conductive bridging from uncured resin contamination.
- Blower Fan RPM & Static Pressure: The 4010 24V blower fan must spin at a nominal 6500 RPM. If resin droplets enter the intake cowl, bearing drag reduces airflow, causing the PTC heater element to trip its internal 75°C bimetallic thermal snap-switch.
- Chamber Thermal Gradient: Verify chamber equilibrium with an external infrared probe. Target 30°C to 35°C for engineering resins. Allow a 20-minute thermal soak before zeroing the build plate to prevent Z-axis thermal expansion drift.
Photopolymer Cure Physics: The Jacob's Working Curve & Beer-Lambert Law
To optimize exposure times and understand why dimensional inaccuracies or curing failures occur when operating a 12K high-density light engine, technicians must apply the Jacob's Working Curve derived from the Beer-Lambert law of optical absorption. In stereolithography and MSLA, the cure depth (C_d) achieved by the UV light matrix is governed by the radiant exposure energy at the vat surface, the resin's critical exposure energy threshold (E_c), and the optical penetration depth (D_p).
The mathematical relationship is expressed as:
C_d = D_p · ln(E / E_c)
Where:
- C_d: Cure depth in millimeters (mm).
- D_p: Resin penetration depth (slope of the working curve), typically between 0.08 mm and 0.15 mm for high-resolution pigmented resins.
- E: Delivered exposure energy density in mJ/cm², where E = I · t (intensity I in mW/cm² multiplied by exposure time t in seconds).
- E_c: Critical energy threshold required to reach the gel point of the photopolymer resin (mJ/cm²).
Consider a practical workshop scenario using a rigid engineering resin on the UniFormation GKTwo. Benchmarking our light engine with an optical radiometer reveals an average vat-level intensity I = 3.8 mW/cm² across the 405 nm COB matrix. The resin manufacturer specifies E_c = 4.5 mJ/cm² and D_p = 0.115 mm. If our target layer height is 0.05 mm (50 μm), we require a cure depth of at least 0.075 mm (a 1.5x safety factor to ensure inter-layer chemical crosslinking and covalent bonding).
Rearranging the equation to solve for required exposure energy E:
E = E_c · e^(C_d / D_p)
E = 4.5 · e^(0.075 / 0.115) = 4.5 · e^(0.652) = 4.5 · 1.919 = 8.636 mJ/cm²
Now, calculating the exact required exposure time t:
t = E / I = 8.636 mJ/cm² / 3.8 mW/cm² = 2.27 seconds
If the workshop temperature drops from 30°C to 20°C without the PTC heater active, radical mobility decreases and dissolved oxygen inhibition rises, effectively increasing E_c by up to 35% (from 4.5 to 6.07 mJ/cm²). Under the same 2.27-second exposure, the delivered energy produces a cure depth of only 0.040 mm—failing to bridge the 0.050 mm layer height and causing massive delamination failures. This mathematical proof underscores why stable vat temperature regulation on the GKTwo is mandatory for repeatable industrial production.
Dual Linear Rail Z-Axis: Lead Screw Runout, Alignment, and Carriage Preload
The vertical motion system of the GKTwo utilizes dual MGN12-style linear guide rails flanking a precision stainless steel T8x4 lead screw. Unlike cantilevered single-rail designs that suffer from angular pitch deflection under heavy peel forces, dual rails provide exceptional torsional rigidity. However, improper factory assembly, uneven clamp torque, or contaminated recirculating ball bearings create periodic Z-banding and layer inconsistency.
Field maintenance technicians must inspect the motion gantry using the following diagnostic protocol:
- Lead Screw Total Indicated Runout (TIR): Mount a dial test indicator on the rear aluminum chassis with the stylus resting perpendicular to the lead screw flank at mid-travel. Rotate the screw manually through 360 degrees. TIR must not exceed 0.025 mm. Runout exceeding 0.05 mm introduces periodic lateral wobble that translates into 4 mm-pitch visible horizontal striations across large surface prints.
- Carriage Block Preload and Slop: Inspect the dual linear guide blocks for play. There should be zero detectable axial or radial lash when rocking the gantry arm by hand. If micro-chatter is detected, remove the bearing blocks, flush out old grease with mineral spirits, and replace any deformed chrome steel ball bearings (3/32-inch diameter).
- Coupler Radial Alignment: The flexible plum-blossom jaw coupler connecting the 42-48 stepper motor to the lead screw must maintain a 1.5 mm clearance gap between the motor shaft tip and lead screw bottom. If the shafts bottom out inside the coupler, motor axial thrust transfers directly into the screw, inducing severe Z-axis bind.
- Lubricant Selection: Never apply automotive aerosol grease, WD-40, or thin machine oils. Use a synthetic grease formulated with PTFE (such as Super Lube synthetic grease with Syncolon) or Mobil Velocite No. 6 spindle oil on the linear rails. Re-lubricate every 300 machine operating hours.
For cross-platform build volume benchmarks and mechanical hardware comparisons, explore our teardown analysis of the UniFormation GKTwo 12K Specs, Teardown & Buying Guide to see how its structural chassis compares to competing machines.
10.3-Inch 12K Monochrome LCD: Heat Sinking, Polarizer Life, and Voltage Tuning
The heart of the GKTwo is its 10.3-inch 12K monochrome liquid crystal display. Monochrome panels offer high optical transmission (~6% to 7% transmission efficiency versus 1.5% for older RGB screens), but the intense 405 nm UV LED matrix generates substantial thermal energy. Over 90% of the electrical energy consumed by the UV COB array is converted into heat rather than light. If heat is not removed from the LCD sandwich, liquid crystal degradation, optical polarizer yellowing, and dead pixel clusters will appear prematurely.
The GKTwo uses an aluminum heat sink block directly coupled to the LED array with a thermostatically controlled exhaust fan. When servicing the optical assembly:
| Subsystem Component | Inspection Frequency | Nominal Operating Spec | Failure Symptom & Action |
|---|---|---|---|
| 405 nm COB LED Array | Every 500 Hours | 3.6 - 4.2 mW/cm² at vat center | Light intensity drop >15%; clean array optics or replace driver board |
| 12K LCD Polarizer Film | Monthly | Optical clarity >98%, scratch-free | Bubbling or black burn spots; replace LCD assembly immediately |
| Aluminum Heat Sink Fins | Quarterly | Clean, zero lint/resin accumulation | Dust clogging airflow; blow out with dry filtered compressed air |
| Cooling Intake Fan (8025) | Monthly | 2200 RPM ± 10%, 24V DC | Fan failure triggers thermal throttling; replace sleeve bearing fan |
| Optical Glass Screen Protector | Weekly | Tempered 9H, optical grade, clean | Cured resin drops; scrape with plastic razor blade and 99% IPA |
Technicians working on multiple resin printers will notice that resin screen longevity depends heavily on physical protection. Similar optical contamination risks and cleaning protocols are detailed in our Anycubic Photon Mono 4 Ultra Troubleshooting Guide, where light intensity decay creates similar layer separation symptoms.
ACF vs. nFEP Film Dynamics: Suction Force and Hydrodynamic Squeeze Physics
The GKTwo ships standard with advanced film (ACF or nFEP). Understanding the fluid mechanics during the peel cycle prevents catastrophic film punctures and print failures. During the initial separation phase as the build plate lifts upward, a low-pressure hydrodynamic suction pocket develops between the freshly cured resin layer and the vat release film.
This separation phenomenon can be modeled via the Stefan Adhesion Equation for parallel flat disks separated by a viscous liquid film:
F_suction = (3 · π · η · R^4) / (2 · h^3) · (dh / dt)
Where η represents dynamic resin viscosity (Pa·s), R is the effective radius of the cross-sectional printed area, h is the separation gap distance, and dh/dt is the instantaneous lift speed. Notice the inverse cubic relationship with gap height (h³) and the fourth-power sensitivity to part diameter (R&sup4;). When a solid flat cross-section is printed, the initial suction force can exceed 250 Newtons (over 25 kgf of tensile load), stretching standard FEP films beyond their elastic yield point.
ACF (Activation Composite Film) features a micro-textured matte release surface that allows resin to rapidly backfill micro-cavities, breaking vacuum suction much faster than glossy nFEP or standard FEP. However, ACF slightly reduces optical collimation, introducing light scatter that requires tight exposure control. When tuning film parameters:
- ACF Lift Speed Profile: Two-stage lift is recommended. Stage 1 (0 to 3 mm): 60 mm/min to gracefully detach from the film. Stage 2 (3 to 6 mm): 180 mm/min to evacuate fresh resin into the gap.
- Retract Speed Tuning: Two-stage retract prevents hydrodynamic shock. Stage 1: 180 mm/min down to 2 mm above zero. Stage 2: 40 mm/min down to the mechanical stop, allowing high-viscosity resin to squeeze outward without bending delicate support struts.
- Rest Time After Retract (Light-Off Delay): Set a minimum 1.5-second to 2.5-second rest time before firing the UV array. This permits the resin film beneath the plate to reach static equilibrium, eliminating hydraulic displacement wave artifacts.
- Film Tension Resonance Tuning: When replacing the vat film, use an acoustic guitar tuner app or spectrum analyzer microphone. Tighten the perimeter tensioning bolts diagonally until the drum resonance frequency hits 320 Hz to 350 Hz across the membrane.
Four-Point Build Plate Leveling & Ball-Joint Lock Creep Mitigation
The GKTwo features a rugged four-screw leveling mechanism built directly into its quick-release build head. While superior to single-screw ball joints that easily slip under heavy peel torque, four-point plates can still experience leveling creep if the tensioning bolts are torqued unevenly or contaminated with resin residue.
Follow this precise leveling protocol during routine setup or whenever swapping build plates:
- Step 1 - Thorough Surface Cleaning: Clean the laser-etched aluminum build plate and the LCD glass protector with 99.9% pure isopropyl alcohol. Inspect the plate surface for burrs, cured resin flecks, or gouges using a precision machinist straight edge.
- Step 2 - Loosen Tension Screws: Completely back out the four corner clamping socket-head cap screws (M5) by 2 full turns. Ensure the build plate moves freely on its internal spring suspension.
- Step 3 - Zeroing Medium: Place the empty resin vat with a fresh, clean film installed into the printer (or use two sheets of 80 gsm standard paper as an optical shim across the screen). Secure the vat locking clamps firmly.
- Step 4 - Homing Sequence: Navigate to the touchscreen tools menu and press 'Home Z'. The gantry will descend until the optical endstop triggers, gently compressing the plate against the vat floor.
- Step 5 - Downward Pressure Application: Apply firm, balanced downward hand pressure across the center of the build plate handle (approximately 3 to 4 kg of downward force) to ensure complete planar contact across the four corners of the LCD glass.
- Step 6 - Diagonal Torquing Pattern: Tighten the four M5 screws using a cross-pattern (Front-Left → Rear-Right → Front-Right → Rear-Left). Tighten each screw incrementally to 4.2 N·m of torque. Do not over-torque past 5.0 N·m, as this will deform the aluminum bracket threads.
- Step 7 - Setting Z=0: Confirm uniform resistance at all four corners, then press 'Set Z=0' on the control screen. Back off the plate by 0.05 mm if initial bottom layer squish is excessive.
Exhaustive Preventive Maintenance Schedule & Torque Specs
To avoid unplanned machine downtime in job-shop environments, follow this comprehensive preventive service matrix:
| Component Subsystem | Maintenance Operation | Recommended Interval | Required Tool / Chemical |
|---|---|---|---|
| Dual Linear Rails (MGN12) | Degrease, clean ball tracks, apply synthetic PTFE lube | Every 250 Operating Hours | IPA 99%, lint-free cloth, Super Lube synthetic grease |
| T8x4 Lead Screw | Inspect for brass nut wear, wipe clean, apply spindle oil | Monthly | Mobil Velocite No. 6 or light synthetic grease |
| PTC Air Blower Fan | Clean impeller blades, inspect ducting for resin mist | Every 100 Hours | Dry compressed air (max 30 psi), soft nylon brush |
| Air Carbon Filter Cartridge | Replace activated carbon honeycomb block | Every 3 Months (or 600 Hours) | OEM replacement activated carbon block cartridge |
| Vat Clamp Screws | Inspect threads, apply light thread anti-seize | Bi-monthly | M4 thumbscrews, silicone dry lubricant |
| Build Plate Clamp Lever | Check cam lock clamping tension and pivot pin play | Monthly | Hex key 4 mm, dial caliper check |
Troubleshooting Common GKTwo Field Failures
When unexpected failures occur during active print runs, consult this shop floor symptom matrix to identify root causes and immediate corrective remedies:
- Symptom: High-Pitched Squeal During Z Movement:
Root Cause: Dry lead screw brass nut or misaligned dual rail carriages.
Fix: Clean lead screw with a brass wire brush and apply PTFE lubricant. Loosen rail carriage mounting screws slightly, run the gantry through full travel twice, and re-torque screws to allow carriage self-alignment. - Symptom: Bottom Layers Sticking to Film Instead of Build Plate:
Root Cause: Insufficient bottom exposure, unheated cold resin (<22°C), or build plate ball-joint lock creep.
Fix: Verify PTC chamber heater reaches 30°C before printing. Increase bottom layer exposure time by 20% (e.g., from 25s to 30s for 4 bottom layers). Re-level build plate using the diagonal torquing protocol. - Symptom: Error Code E-03 (Heater Over-Temperature):
Root Cause: Blower fan failure, blocked airflow return vents, or thermal sensor failure.
Fix: Check if the 4010 blower fan spins when heater turns on. Clear rear exhaust channel. Measure thermistor resistance to verify it has not shorted. - Symptom: Repeating Horizontal Lines on Print Surface (4 mm Pitch):
Root Cause: Bent lead screw, eccentric stepper motor coupling, or foreign debris inside lead screw thread.
Fix: Measure lead screw runout with a dial indicator. Check jaw coupler gap (ensure 1.5 mm separation between shafts). Thoroughly clean lead screw threads of brass swarf.
Frequently Asked Questions
How often should the activated carbon air filter be replaced on the UniFormation GKTwo?
Under continuous workshop production, replace the activated carbon cartridge every 3 months or after approximately 500 to 600 print hours to maintain efficient volatile organic compound (VOC) adsorption.
What is the optimal vat heating temperature for engineering-grade resins on the GKTwo?
Set the internal PTC chamber heater between 30°C and 35°C, allowing a minimum 20-minute thermal pre-soak so the resin reaches chemical equilibrium before initiating the print cycle.
Can I use standard FEP film instead of ACF on the GKTwo 12K vat?
Yes, standard FEP or nFEP can be installed, but you must reduce lift speeds by at least 40% (down to 40-50 mm/min) to accommodate higher vacuum suction forces and avoid premature film tearing.
What lubricant is recommended for the GKTwo dual linear rails and lead screw?
Use high-grade synthetic grease with PTFE (such as Super Lube synthetic grease) on the linear guide carriages and Mobil Velocite No. 6 spindle oil or light synthetic grease on the T8 lead screw.
Shop Safety & Isopropyl Alcohol Protocols
DANGER: Never activate the PTC ceramic heater or operate the chamber circulation fan when isopropyl alcohol (IPA) or flammable cleaning solvents are inside the printer enclosure. The heating element and brush-type blower motors can generate ignition sources capable of igniting concentrated alcohol vapors. Always allow the print chamber to thoroughly ventilate and ensure all resin residue is dry before re-engaging the chamber heating system.
Related Intel
Elegoo Saturn 3 Ultra Hardware Failures and Repairs
Diagnose and resolve Elegoo Saturn 3 Ultra hardware failures, including ACF film release tension loss, Z-axis ball screw banding, and 12K LCD thermal overheating under continuous production.
Formlabs Form 4 LFD Peeling & Mixer Error Field Guide
Industrial troubleshooting guide for the Formlabs Form 4: resolve Low Force Display (LFD) peel tension errors, fix magnetic resin mixer jams, and debug cartridge RFID level sensing faults.
Anycubic Photon Mono M7 Max and M5s Pro Review
An in-depth engineering review of Anycubic Photon Mono M7 Max and M5s Pro resin 3D printers, analyzing 14K optics, ACF peel physics, and Z-axis cantilever rigidity.