Bambu Lab H2C & H2D Troubleshooting

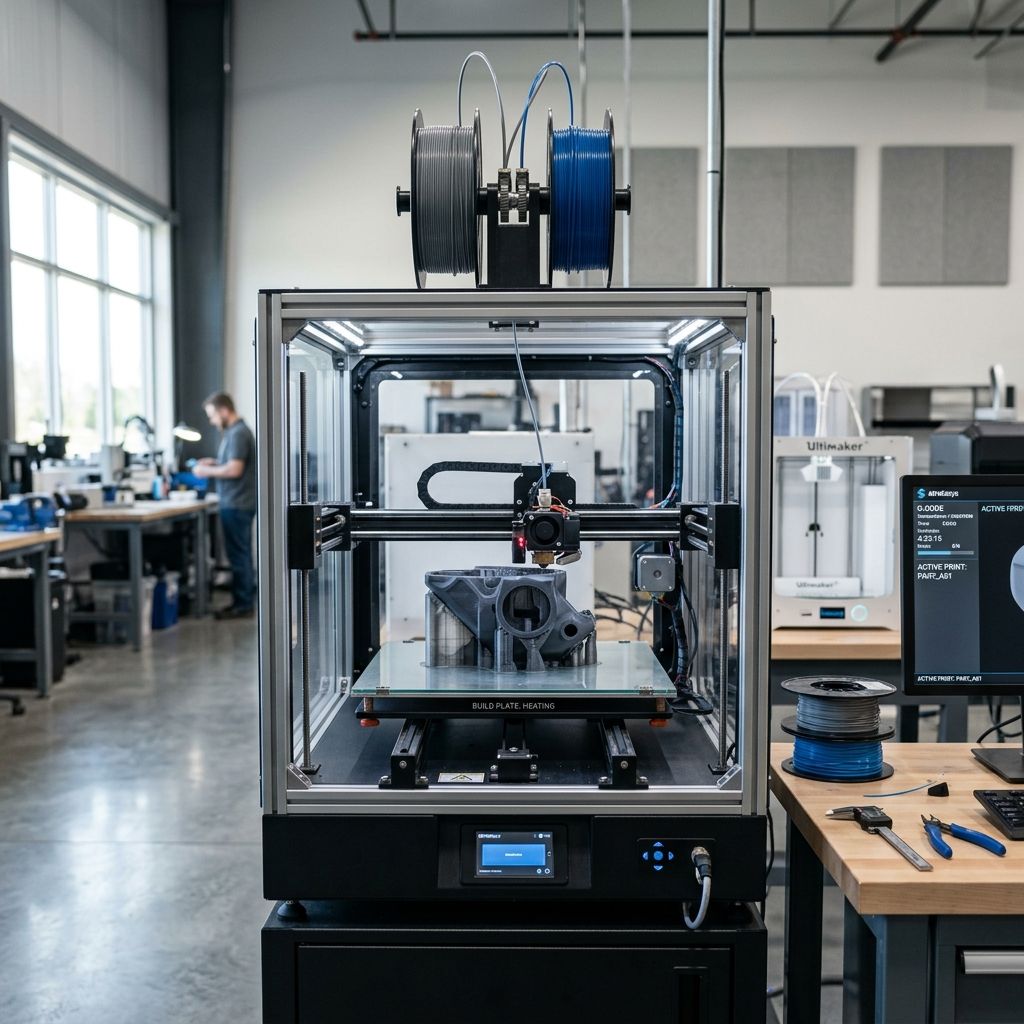
Bambu Lab H2C & H2D Auxiliary Systems: Field Troubleshooting & Community Solutions Log
An experience-driven engineering teardown of the high-temperature chamber preheaters (H2C) and inline active desiccant dryers (H2D) deployed on industrial Bambu Lab setups.
Executive Technical Specs
The H2C (Chamber Preheater) and H2D (Inline Active Dehumidifying Dryer) auxiliary modules are designed to overcome the default thermal limits of stock Bambu enclosures. When printing high-shrinkage materials like PA-CF, PC, and PVDF, these systems maintain elevated ambient temperatures and ultra-low relative humidity along the filament feed path.
Use our Filament Drying Calculator to compute the precise drying cycles for Nylon, polycarbonate, and other high-temp polymers before feeding them into your inline setup.
If you run a job shop or a prototype lab, you know that the stock Bambu Lab enclosures struggle to maintain a stable, high-ambient chamber temperature for warping-prone industrial polymers. To bridge this gap, many of us integrate auxiliary active heating units specifically the H2C chamber preheater and the H2D inline active desiccant dryer. While these systems resolve layer adhesion issues on paper, they introduce a fresh set of electro-mechanical failure points that will halt your production line if left unchecked.
After thousands of hours running PA-CF, PPS, and polycarbonate on modified machines, we have seen where these systems fail, how they behave under continuous thermal soak, and how to keep them running. This log details the top three technical failures we encounter in the field, the physics behind why they break, and the exact protocols we use to fix them.
1. Thermal Runaway & Solid-State Relay (SSR) Arcing in the H2C
The H2C chamber preheater utilizes a high-draw PTC heating element controlled by a Solid-State Relay (SSR). Because these aftermarket kits are often crammed into tight spaces under the printer frame or mounted directly to the rear panel, heat dissipation for the control electronics is frequently treated as an afterthought. Under continuous production cycles, the heat sink on the SSR cannot shed thermal load quickly enough, leading to gate failure.
When an SSR fails, it almost always fails in a closed (conducting) state. This causes the PTC heater to run wide open without thermal regulation, triggering the Bambu's internal safety sensors or, worse, melting the H2C's plastic housing and warping the nearby gantry components.
The Physics of SSR Thermal Failure
An SSR's power dissipation is primarily driven by the forward voltage drop across its internal switching transistor (usually a triac or MOSFET). We can calculate the heat generated inside the relay housing using the following formula:
Formula for SSR Power Dissipation:
P_d = V_f × I_load
Where:
- P_d: Power dissipated as heat (Watts)
- V_f: Forward voltage drop across the triac (typically 1.2V to 1.6V for common AC relays)
- I_load: Current drawn by the PTC heater (Amperes)
For a standard 500W H2C heater running on a 110V AC mains line:
I_load = 500W / 110V ≈ 4.55A
P_d = 1.2V × 4.55A ≈ 5.46W
While 5.5 Watts of waste heat does not sound like much, in a sealed, unventilated bottom electronics bay where the ambient air is already at 50°C, the junction temperature (T_j) of the silicon quickly exceeds its maximum rated limit (typically 125°C). The thermal resistance equation governs this behavior:
T_j = T_a + P_d × (R_θj-c + R_θc-h + R_θh-a)
Where T_a is ambient temperature, and the R_θ variables represent the thermal resistances from junction to case, case to heatsink, and heatsink to ambient air. When T_j crosses the threshold, the silicon loses its ability to block voltage, locking the switch to "ON." If you are constantly battling extrusion failures when using these dry boxes, refer to our guide on X1-Carbon Hotend Failure Diagnosis and Replacement to check if your nozzle is structurally compromised by erratic heat cycles.
The Workshop Fix
Do not rely on the cheap, unbranded SSRs shipped with generic H2C kits. Toss them in the bin and install a genuine, industrial-grade Omron or Crydom relay rated for at least twice your expected current load. More importantly, modify the mounting footprint:
- Isolate and Mount: Move the SSR out of the printer's internal lower electronics bay. Mount it externally on an aluminum bracket attached to the rear steel frame of the printer.
- Thermal Compound: Clean the mounting surfaces with isopropyl alcohol (IPA). Apply a high-thermal-conductivity zinc-oxide or silver-based thermal paste between the SSR baseplate and the aluminum bracket.
- Active Cooling: Tap into a 24V rail on the printer power supply to run a dedicated 4010 dual-ball-bearing fan directly over the SSR heatsink fins. This drops junction temperatures by up to 40°C, completely eliminating closed-state failures.
2. Filament Swelling and Retraction Creep in the H2D Inline Path
The H2D unit actively dries filament as it is pulled into the printer. It does this by blowing heated, dry air through a manifold that surrounds the filament spool. However, if the filament feed path is too close to the heat outlet, or if the user sets the drying temperature too close to the polymer's Glass Transition Temperature (T_g), the filament softens inside the PTFE guide tubes before it ever reaches the toolhead.
As the Bambu's feeder gears execute rapid retractions during a print, they compress this softened filament. The material swells, increasing its diameter beyond the tight tolerances of the internal PTFE tubing (typically 2.0mm ID for 1.75mm filament). This causes severe feed-path friction, motor driver overheating, and eventual extrusion failure.
Tech Alert: Never dry PLA or PETG in the H2D above 45°C, or TPU above 40°C. Even though these filaments can handle higher temperatures on the spool in a static oven, the continuous tension and pulling forces of active inline feeding will cause premature elongation and necking down at lower temperatures than you think.
The Mechanics of Feed Path Drag
When filament softens, its coefficient of friction against the fluoropolymer (PTFE) wall increases exponentially. Under normal conditions, PTFE-on-filament friction is negligible (around 0.04 to 0.1). However, as the polymer surface approaches its softening point, it deforms into the micro-pores of the PTFE tube, driving the friction coefficient up to 0.4 or higher. This creates a cumulative drag force along the curved feed path. If you are running demanding materials, balancing these thermal profiles is critical. See our field notes on X1-Carbon/X1E High-Temp Material Fixes to dial in those tricky first layers.
The Field Fix: Decoupled Feeding
To eliminate filament swelling and path friction, we implement a decoupled buffer loop between the H2D outlet and the toolhead inlet. Follow this workflow:
| Step No. | Action Item | Key Performance Indicator (KPI) / Target Spec |
|---|---|---|
| 1 | Install a low-friction Y-splitter at the toolhead entrance. | Allows manual feeding without disconnecting tubes. |
| 2 | Replace standard 2.0mm ID PTFE tubing with 2.5mm ID tubing for the hot zone. | Provides a 0.75mm clearance buffer around the 1.75mm filament. |
| 3 | Introduce a cooling loop (minimum 150mm length) exposed to room ambient air. | Filament temperature drops below T_g before entering the extruder. |
| 4 | Calibrate the H2D heater control loop to match ambient humidity levels. | Maintain less than 15% Relative Humidity (RH) inside the dry chamber. |
3. Recirculating Fan Seizure and Volatile Gas Degradation
Both the H2C and H2D rely on high-RPM recirculating fans to distribute heat evenly. In an enclosed Bambu Lab printer running ABS, ASA, or Nylon, the air is thick with volatile organic compounds (VOCs) and monomer outgassing (such as styrene, caprolactam, and plasticizers). These airborne chemicals are pulled directly through the fan assembly of the H2C/H2D modules.
Standard sleeve-bearing fans, and even cheap dual-ball-bearing fans, use petroleum-based greases that dissolve when exposed to high-temperature styrene vapors. Once the grease degrades, the bearings run dry, chatter, and eventually seize. Without air circulation, the heating elements quickly burn out, or the thermal fuse blows, bricking the unit mid-print.
Analyzing Fan Bearing Degradation
When styrene gas condensates inside the bearing housing, it acts as a solvent, stripping the lubricating film. The metal-on-metal contact between the steel balls and the inner race increases friction torque, leading to rapid thermal expansion of the bearing components. This can be modeled by the thermal expansion equation:
ΔL = α × L_0 × ΔT
Where α is the coefficient of thermal expansion for bearing steel (approx 12 × 10^-6 / °C). As local friction drives ΔT up by 80°C to 100°C above chamber ambient, the balls expand beyond the radial clearance of the bearing cage, locking the rotor solid. To prevent structural failure of the gantry belts under these elevated thermal loads, you must establish a strict routine. Follow the Bambu Lab X1-Carbon Preventive Maintenance Protocol to clean and re-tension your motion components.
- Bearing Type Required: High-temp ceramic or fluorinated-grease-sealed steel
- Target MTBF in VOC Environment: >10,000 Hours
- Maximum Operating Chamber Temp: 85°C
- Recommended Fan Material: Polybutylene Terephthalate (PBT) reinforced with fiberglass
The Workshop Fix: Relubrication and Material Swap
If your recirculating fan starts emitting a high-pitched whine or squeal, do not just spray WD-40 on it. That is a temporary fix that will fail within three hours of high-temperature printing. Instead, perform this upgrade:
- Source the Right Hardware: Replace stock fans with those utilizing MagLev (magnetic levitation) bearings or specialized high-temperature IP58 double-ball bearings sealed with synthetic fluorinated lubricants (such as Krytox GPL-226).
- Install an In-Line VOC Filter: Position a small, replaceable activated-alumina or activated-carbon pre-filter directly upstream of the H2C fan intake. This traps the heavy monomer vapors before they reach the motor assembly.
- Routine Purge: Every 200 hours of printing, spray the fan assemblies with a non-residue electronic contact cleaner to flush out accumulated plasticizer film.
Comprehensive Troubleshooting Matrix
Use this diagnostic table when your H2C or H2D system behaves erratically on the shop floor.
| Symptom | Root Cause | Immediate Field Action |
|---|---|---|
| H2C displays "HEATER ERROR" but ambient temp is cold. | Blown thermal fuse on the PTC housing. Usually caused by fan failure. | Test fuse continuity with a multimeter. Replace the 115°C thermal cutoff fuse. Check fan operation. |
| Filament is brittle and snaps inside the H2D inlet. | Filament has been "over-baked" due to static heat spots inside the dryer. | Clip the brittle section. Rotate the spool 180 degrees. Lower dryer setpoint by 5°C. |
| Bambu printer throws a "Chamber Temp Too High" error. | H2C has overshot target temp because the SSR gate is locked open. | Cut mains power to the H2C instantly. Replace the failed SSR with an industrial-grade unit. |
| Under-extrusion or clicking noises in the toolhead. | Filament swelling in the feed path due to high inline dryer temps. | Measure the diameter of the filament exiting the H2D. If >1.80mm, lower H2D temp immediately. |
Industrial Alternatives & Hacky Field Fixes
When you are in the middle of a rush job and your H2C or H2D fails, you do not always have time to wait for replacement industrial parts. Here are the battle-tested field fixes we use to keep machines running, alongside the long-term industrial upgrades we transition to when budget permits.
The "Emergency" Chamber Heater Fix
If your H2C heater blows its thermal fuse and you have a 40-hour nylon print on the deck, you can build a crude but effective passive heat-retention setup. Remove the top glass lid of the Bambu. Cover the top opening with a sheet of 5mm thick polyisocyanurate (PIR) foam board insulation, cut to size. Wrap the exterior glass doors with draft-excluding silicone tape.
By running the heated bed at 110°C for 45 minutes before starting the print, you can heat-soak the chamber up to 55°C without an auxiliary heater. It is not as precise as a PID-controlled H2C, but it keeps the internal air hot enough to prevent warp-induced print failures on large parts.
The "Dehydrator Hookup" (H2D Alternative)
If your H2D inline dryer control board fries, do not try to rewire it on the fly. Instead, grab a cheap, round food dehydrator from the local hardware store. Modify it by drilling two holes in the plastic lid, inserting 4mm OD pneumatic fittings, and routing PTFE tubing directly from the dehydrator tray to the rear of your Bambu. Run the dehydrator on its maximum setting (usually 70°C for meat drying). This provides a continuous stream of dry air and a low-friction spool rotation platform that outperforms many commercial dry boxes.
- Temporary Hack Setup: Modified food dehydrator + 2.5mm ID PTFE tubing
- Average Cost of Hack: $40 USD
- Moisture Recovery Rate: 12% to 15% RH maintained over 24 hours
- Long-term Solution: Wall-mounted cabinet dehumidifier with dry nitrogen purge
Frequently Asked Questions
Why does my Bambu toolhead housing sag after installing the H2C?
The stock Bambu toolhead housing is molded from a polycarbonate/ABS blend that softens around 85°C. If your H2C preheater is blowing hot air directly onto the toolhead rather than circulating it evenly, local hot spots will exceed this threshold and cause the plastic to warp under belt tension.
Can I run the H2D inline dryer continuously for multiple weeks?
No, standard H2D units are not designed for 100% duty cycles. The internal PTC ceramic heating blocks will degrade, and the cheap axial fans will fail. We recommend setting a timer to shut down the H2D for 4 hours after every 48 hours of continuous operation to allow the thermal components to settle.
What is the absolute maximum safe chamber temperature for a modified Bambu X1C?
While the carbon fiber rods and linear rails can handle high heat, the stepper motors, belt plasticizers, and plastic structural brackets will begin to degrade rapidly if the chamber temperature exceeds 70°C for extended periods.
Critical Torque Spec
When reinstalling the H2C mounting bracket to the rear panel of your Bambu printer, do not over-tighten the M3 self-tapping screws. The rear sheet metal is thin (0.8mm) and strips easily. Tighten them to a maximum of 0.8 N·m (Newton-meters). If you strip the threads, you will have to drill out the holes and use M3 rivet nuts, which is an annoying, precision-demanding task in a cramped workspace.
Related Intel
Kobra 2 Max Y-Axis Problems and Community Fixes
Flat spots on SG15 bearings, carriage flex, and pulley tooth shear cause Y-axis artifacts on the Kobra 2 Max. Fixes: lubricate rails, reduce acceleration, and check belt tension.
Fixing Kinematic Binding on RatRig V-Core 3.1
RatRig V-Core 3.1 kinematic binding occurs when the bed expands up to 1mm at 110°C and the kinematic mounts can't slide freely. Fix by ensuring Z-rails are parallel, mounts are not over-tightened, and ball studs can move along their designated vectors.
Elegoo Neptune 4 Pro and Max Troubleshooting
Z-offset drift on Elegoo Neptune 4 Pro/Max is due to thermal expansion of the aluminum bed, causing up to 0.4 mm height change. Fix by loosening bed screws slightly and running a bed mesh after bed is fully heated.