X1-Carbon/X1E High-Temp Material Fixes

* Affiliate Disclosure: We may earn a commission from qualifying purchases made via our verified links at no additional cost to you.
The Industrial Maker is reader-supported. When you purchase equipment, parts, or materials through links on our site, we may earn an affiliate commission at no additional cost to you.
Bambu X1-Carbon/X1E: The Material Scientist's Workbench vs. The Marketing Fantasy
A forensic deep-dive into the thermodynamics, firmware logic, and material profiles that separate production-grade parts from expensive spaghetti. We're not here for the PLA experience.
Recommended Hardware: Bambu Lab X1-Carbon & X1E
Check current stock, real-time pricing, and official replacement parts directly on Amazon:
View on Amazon • Check Live Price →Data Sheet: Real Machine Ceilings
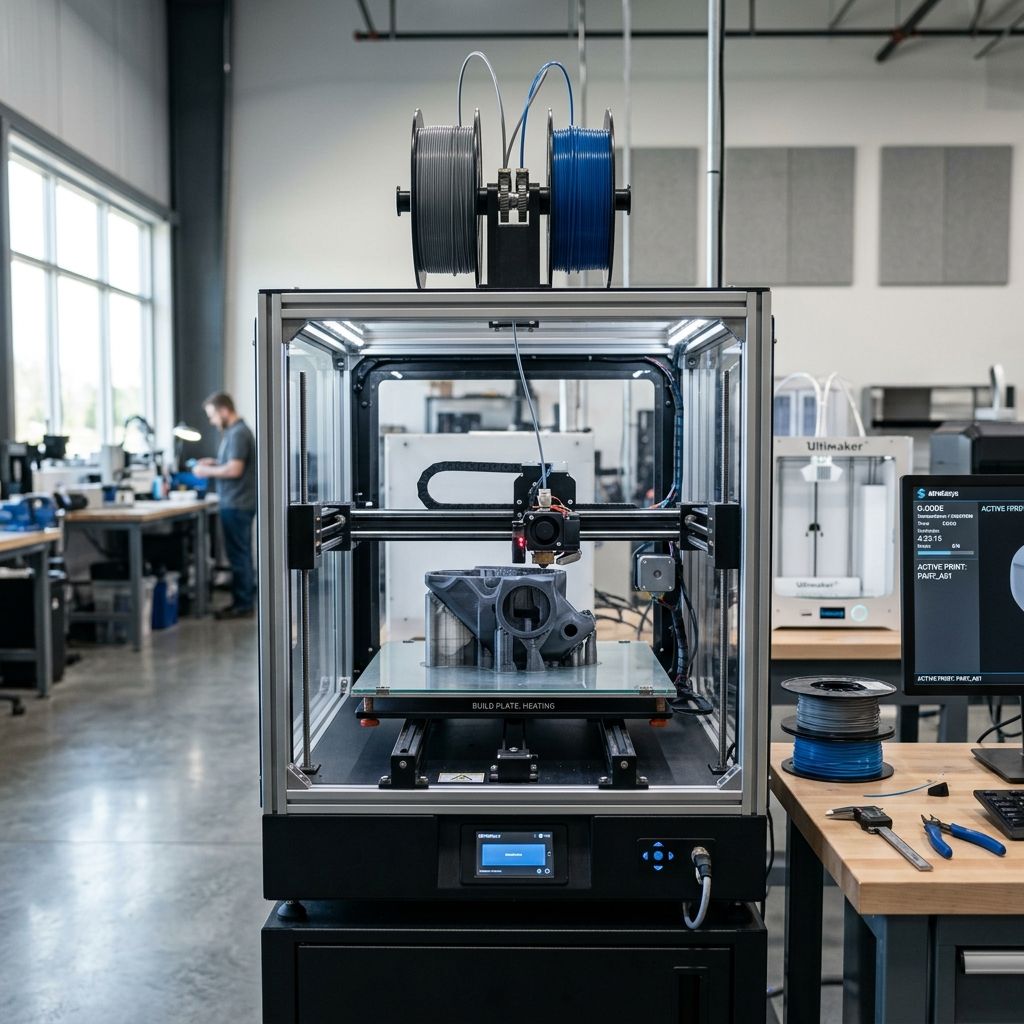
The X1-Carbon and X1E are closed-loop feedback systems (Lidar + Extruder Load Cell) that sit at the intersection of consumer accessibility and industrial material processing. The marketing says "unlock engineering materials." The reality is that the stock profiles are a dangerous starting point.
- Maximum Nozzle Temperature: X1C: 300°C (stock), X1E: 320°C (stock). Needed for PPA, PPS, PPSU.
- Maximum Bed Temperature: X1C: 100°C, X1E: 110°C. Critical difference for polycarbonate crystallization.
- Maximum Chamber Temperature: X1C: ~45°C (passive soak), X1E: 60°C (active PTC heater).
- Flow Bottleneck: ~12 mm³/s for PAHT-CF, ~8 mm³/s for PPS. The extruder gear ratio limits torque at high speeds.
- Drying Requirement: PA6/PA12 require dew point < -30°C. The AMS desiccant system is for maintenance, not dehydration.
1. Thermal Architecture: The Hotend is a Liar, The Chamber is a Battery
The ceramic heater on the X1C/X1E is reactive, but the thermistor placement is in the block, not the melt zone. This means thermal lag is a real enemy for high-temp materials. If you ramp from 260°C to 320°C for PPS, the nozzle tip may lag by 10-15°C for the first 30 seconds of the print. I've seen this cause under-extrusion on the first layer of PPA-CF parts.
The "Soak" Procedure: For the X1E, the active chamber heater is undersized for the aluminum frame's thermal mass. You need a 30-minute pre-soak with the bed at 110°C and the chamber set to 60°C before the filament even touches the nozzle. Add this to your start G-code via the "Machine Start G-Code" field. Just a simple M141 S60 and a G4 S1800 (30 min dwell). Yes, it wastes energy. Yes, it stops warping.
Part Cooling is a Lie for Engineering Materials: The auxiliary fan on the X1C causes more problems than it solves for semi-crystalline polymers. For PA12-CF, PPA-CF, and PPS, the part cooling fan should be 0% for the first 20 layers and max 10% for overhangs. The firmware will fight you on this it applies cooling automatically in the "Cooling" tab. You have to go into the filament profile and force the fan speed to 0% globally for these materials. I've had parts delaminate mid-print because the aux fan kicked on at layer 50 and dropped the chamber temp by 8°C.
2. The "Generic Profile" Deception
Bambu Studio ships with "Generic PAHT-CF" and "Generic PPA-CF" profiles. These are calibrated for a standard machine in a standard lab environment. In my experience, the flow calibration routine (Lidar) will often set the flow ratio to 0.95 for PAHT-CF, which results in weak, porous layers. The Lidar measures the extrusion pad, but it struggles with dark, matte filaments like carbon-fiber nylon. It's reading reflected laser intensity. Black CF absorbs the laser, causing inconsistent readings.
Here's the compatibility reality check:
- PLA / PETG Generic Profile Okay? Yes Key Modifications: Standard Field Reality: Flawless. It's the reason the machine is popular.
- ABS / ASA Generic Profile Okay? Mostly Key Modifications: Disable aux fan, bed at 100°C Field Reality: Large parts warp on the corners. Chamber soak helps.
- Polycarbonate (PC) Generic Profile Okay? No Key Modifications: Bed 105°C, glue stick, dry 8h at 85°C Field Reality: Layer adhesion is brittle if flow is wrong. Fan must be 0%.
- PA12-CF / PAHT-CF Generic Profile Okay? Critical Mods Required Key Modifications: Dry 12h at 80°C, fan 0%, 0.6mm nozzle Field Reality: Moisture absorption mid-print causes voids. AMS is not a dryer.
- PPA-CF Generic Profile Okay? Experimental Key Modifications: 320°C nozzle, dry 16h, glue stick on smooth PEI Field Reality: Expensive failures. Blob detection is useless with black filament.
- PPS / PPSU Generic Profile Okay? No Key Modifications: Requires X1E, slow volumetric speed, chamber soak Field Reality: Brittle layer lines if cooling is applied. High shrinkage.
- TPU (95A) Generic Profile Okay? No Key Modifications: Feed from AMS, reduce speed, reduce retraction Field Reality: Tangles and extrusion skip. The AMS hub bends flexible filament.
3. The Drying Crisis: Your AMS is a Humidor, Not an Oven
This is the single most important material science issue for the X1C/X1E. PA6 absorbs 2.7% water by weight in a 24-hour period at 50% RH. At print temperature (290°C), that water turns to steam, creating voids in the layer lines and reducing interlayer adhesion by up to 60%. The typical user blames the nozzle, the bed level, or the "bad batch of filament." It's almost always moisture.
The AMS Desiccant Fallacy: The AMS uses silica gel beads and a humidity sensor. It can maintain a dry environment (<20% RH) if it's sealed. But it cannot dry filament. If you put a spool of PAHT-CF that is at 2000 ppm moisture into the AMS, it will take weeks to reach equilibrium. You need to actively dry the filament.
Workflow for Hygroscopic Materials:
The X1E bed can be hacked as a drying oven. Heat the bed to 100°C, place the spool in a cardboard box with holes poked in it (the box acts as a thermal barrier), and set a dummy print to loop. It takes 6-8 hours. It's not elegant, but it works. For serious work, invest in a dedicated filament dryer (Sovol SH02 or a food dehydrator). Dry PA6 at 80°C for 12 hours. Dry PPA at 90°C for 16 hours. Dry PPS at 120°C for 6 hours (requires a dehydrator that reaches that temp).
4. Adhesion Physics and the Warping Enemy
Semi-crystalline polymers (PA, PPS) crystallize upon cooling, shrinking by ~2-3%. Amorphous polymers (PC, ABS) shrink less but build up internal stress. The X1C has a 100°C bed, which is barely enough for PC. The X1E's 110°C bed gives you a marginal safety margin.
The "Engineering Plate" (smooth PEO) works well for PAHT-CF, but the adhesion is so strong that it can delaminate the PEI coating from the spring steel. I've seen it happen. Use the Bambu Liquid Glue as a release agent. The glue stick creates a sacrificial layer that allows the part to pop off after the bed cools to 40°C.
G-Code Trick for Warp Resistance: On the X1E, after the print finishes, keep the bed at 90°C for 10 minutes, then ramp it down slowly. Add this to your "End G-Code": M140 S90 G4 S600 M140 S70 G4 S300 M140 S0. This controlled annealing reduces internal stress and prevents the part from lifting off the bed.
5. Nozzle Wear and Flow Dynamics: The Extruder Bottleneck
The X1C extruder gear is a hardened steel pinion driving a plastic idler arm. The pressure is fixed by a spring. For filled materials (CF, GF), the abrasive nature of the filament will wear the brass nozzle to 0.45mm within 2kg of printing. This changes the flow rate and ruins dimensional accuracy.
Mandatory Upgrade: Use a 0.6mm hardened steel nozzle for all engineering materials. It provides a wider melt zone, reduces clog potential, and the wall lines will still look good because the layer height is 0.16mm. The volumetric flow rate for a 0.6mm nozzle is ~18 mm³/s for PAHT, which is well within the X1C hotend capability.
The Clog Sequence: With PPS or PPA, the filament softens in the heatbreak. If the retraction is too high (>5mm), the molten polymer is pulled into the cold zone, solidifies, and jams. I set retraction to 1mm for all high-temp materials. The bowden setup doesn't need more than that.
6. Firmware Architectures and Feedback Failure
The Lidar sensor is a first-layer tool. It measures the height of the extrusion pad and computes a flow ratio. It does not measure layer adhesion, warping, or moisture content. The "Spaghetti Detection" is a camera frame-differencing algorithm that fails on black materials in low light. I disable it for PAHT prints because it false-triggers on the black filament's texture.
The Lock-In Problem: Bambu's LAN-only mode is a step forward, but if you lose network connection mid-print, the cloud-based model can pause. For production runs of PPS parts, this is a fire risk. The part warps, the nozzle crashes, and you get a $150 blob. I run X1Es on a dedicated VLAN with no internet access for critical prints.
7. Systematic Profiling Workflow: PPA-CF on the X1E
If you're reading this, you want to print a functional part, not a benchy. Here's my exact procedure for PPA-CF:
- Dry: 90°C for 16 hours in a convection dehydrator. Immediate transfer to AMS with fresh desiccant.
- Profile: Start with "Generic PPA-CF". Change nozzle to 320°C, bed to 110°C, chamber target to 60°C.
- Soak: Add 30-minute dwell in start G-code.
M141 S60 M140 S110 G4 S1800. - Cooling: Set fan speed global override to 0%. Disable aux fan.
- Speed: Set max volumetric speed to 8 mm³/s.
- Adhesion: Use smooth PEI plate. Apply glue stick. Brim width 10mm, brim distance 0.1mm.
- Flow Calibration: Run the Lidar calibration. Then print a single-wall cube. Measure wall thickness with calipers. If it's 0.42mm instead of 0.4mm, set flow ratio to 0.95. If it's 0.38mm, set to 1.05. Do not trust the Lidar.
- Post-Processing: Anneal the part in a convection oven at 120°C for 2 hours, suspended on a wire rack to prevent warping.
8. Quirk Analysis: Troubleshooting the X1C/X1E Material System
Symptom: Blobs on CF Nylon surface. Wet filament + high retraction. Reduce retraction to 1mm, increase drying time to 16h.
Symptom: First layer squish too high / too low. The Lidar is calibrated for standard PLA. For matte PAHT, the laser scatters. Manually adjust Z offset in the filament start G-code using G29.1 Z0.05 increments.
Symptom: AMS feeder clicking. The PTFE tube in the AMS hub creates friction for stiff filaments (PPS, PPA). Print a side spool holder and feed directly to the extruder. The AMS is a liability for high-temp engineering materials.
Symptom: Chamber temp drop mid-print. The X1E exhaust fan pulls air out of the chamber. If the room ambient is 20°C, the chamber heater struggles to maintain 60°C. Cover the top glass with a thin foam insulation board. It drops the wattage required.
Workshop Forensics: The Cost of Complacency
The extruder is the weak link. The driven gear is metal, but the idler is plastic. On high-retraction materials (PA, PC), the gear can wear a flat spot in 200 hours. If you hear a clicking sound on the extruder during a PPA print, you have exactly 3 seconds to reduce the volumetric flow or you'll snap the filament inside the hotend. This requires full hotend disassembly a 2-hour job on a bad day.
Moisture is the silent killer. I've seen a factory-fresh sealed bag of PAHT-CF print with stringing and surface blisters. The "vacuum seal" had pinholes. The material absorbed moisture during shipping. Always dry fresh spools of engineering materials for 8 hours before first use, regardless of the packaging.
Respect the thermal mass. The X1C/X1E is not a toy. It is a precision thermal chamber for polymer processing. If the spec sheet says dry to -30°C dew point, a 4-hour bake at 80°C is not optional. That steam will find your nozzle first, and it will destroy your part's structural integrity from the inside out.
Related Intel
Bambu Lab P1S & P1P Common Problems: Workshop Fixes
Comprehensive engineering root-cause analysis and troubleshooting guide for Bambu Lab P1S and P1P 3D printers. Addresses high-incidence workshop failures including AMS PTFE capstan friction binding, extruder filament cutter jamming, carbon rod bearing slurry build-up, toolhead cover detachment, and enclosure heat creep clogs. Features mathematical formulations for Euler-Eytelwein capstan tube friction and CoreXY belt harmonic resonance tuning, backed by actionable maintenance procedures and diagnostic matrices.
Best Materials for Creality K2 Pro & K1C: Industrial Filament Guide
Definitive materials selection and thermal processing guide for the Creality K2 Pro and K1C high-speed CoreXY 3D printers. Evaluates fiber-reinforced polymers (PA-CF, PET-CF, PC-CF), engineering thermoplastics (ASA, ABS, Polycarbonate), and high-flow flexibles. Includes mathematical formulations for thermal shrinkage strain, peel moment crystallization stress, and hotend volumetric throughput ceilings. Features comprehensive rheological parameter tables, hygroscopic pre-drying protocols, and enclosure heat management guardrails for zero-delamination industrial manufacturing.
Bambu Lab P1S vs P1P: Slicer & Hardware Comparison
Head-to-head engineering and software evaluation of the Bambu Lab P1S versus P1P CoreXY 3D printers. Analyzes enclosure thermal equilibrium thermodynamics, MC board auxiliary cooling, high-temperature composite processing (ABS, ASA, PA-CF), and software ecosystem differences across Bambu Studio, OrcaSlicer, and PrusaSlicer. Features an exhaustive workshop ROI model, failure rate metrics, and a definitive procurement verdict for commercial prototyping shops.