How to Choose a 3D Printing Tool Kit: MatterHackers Review

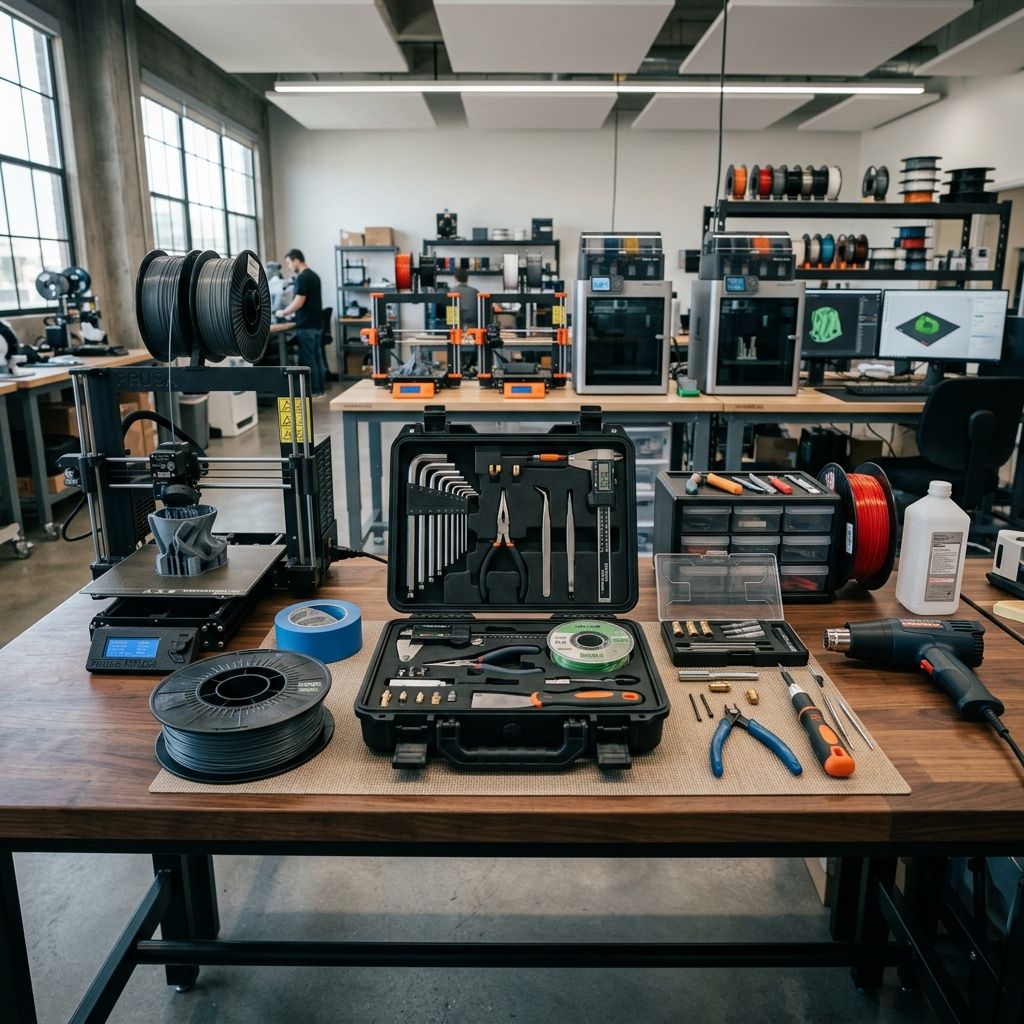
How to Choose a 3D Printing Tool Kit: MatterHackers Workshop Assessment
Evaluating steel metallurgy, service clearance, and bench ergonomics against assembled hardware store kits.
Architectural Assessment: MatterHackers 3D Printing Tool Kit
The MatterHackers Tool Kit occupies a specific functional niche: an all-in-one consolidated maintenance station designed to eliminate bench clutter across rapid prototyping labs and multi-machine print farms. Rather than forcing technicians to hunt through mismatched hardware store organizers, it packages the primary mechanical interfaces required for additive manufacturing: nozzle thermal servicing, part ejection, support removal, and frame alignment. When dialing in bed clearances and hardware wear, cross-reference symptoms with our 3D Printer Troubleshooting tool.
The Economics of Bundled Toolkits vs. Piecemeal Sourcing
Every maintenance technician reaches the same crossroads after purchasing a few 3D printers: do you buy a pre-packaged toolkit or do you assemble a bespoke set piece by piece from high-end industrial brands? On paper, buying individual tools from PB Swiss, Knipex, Wiha, and Mitutoyo yields superior metallurgy. A Wiha ball-end driver set, Hakko micro-shears, and a Mitutoyo 150 mm vernier caliper will last decades under daily abuse. However, that custom roll-up pouch will easily set you back $220 to $300 before you even add nozzle-specific torque sockets, deburring tools, and flexible palette knives.
For a production facility running ten to thirty FDM machines, outfitting every single workstation with top-tier individual German or Japanese hand tools destroys shop ROI. The MatterHackers Tool Kit bridges that gap by offering a curated bundle at roughly a third of that cost. You sacrifice peak metallurgical longevity on secondary items like the hex wrenches, but you gain immediate operational standardization. Every technician in the bay reaches for the same zippered case, finds the same 7 mm socket for an E3D or Volcano block, and uses identical blade profiles for brim removal.
In our shop runs, we found that standardized kits reduce machine downtime caused by technicians using improper makeshift tools. The moment an operator tries to break loose an over-torqued heatbreak using slip-joint plumbing pliers because the correct wrench went missing, you end up with a sheared heatbreak and a destroyed thermistor cartridge. Having dedicated kits tied to specific machine cells stops that improvised destruction.
Furthermore, tool accountability in an educational makerspace or shared industrial prototyping cell is notoriously difficult. When individual tools are acquired ad hoc, loose Allen wrenches and wire cutters migrate between workstations and vanish into drawers. A foam-molded or elastic-banded zippered enclosure provides an immediate visual 5S audit: if a technician finishes a shift and an open pocket exists in the MatterHackers case, you know instantly that a nozzle wrench or deburring blade is still sitting inside an active build chamber.
Metallurgy and Material Selection: S2 Steel vs. Stamped Carbon Alloys
The primary point of differentiation between cheap generic toolkits and industrial-grade bench tools lies in alloy composition and heat treatment. Budget Amazon toolkits notoriously cut corners by using stamped low-carbon sheet steel (such as generic Q235 or unhardened A3 carbon steel) for wrenches and spatulas. These soft tools deform the first time you confront a stubborn M3 socket head cap screw that was factory-set with medium-strength threadlocker.
The MatterHackers kit employs a step up in metallurgy, using chrome-vanadium (Cr-V) and carbon tool steels with induction-hardened working surfaces. On the Rockwell C scale (HRC), tool steel hardness dictates the boundary between deformation and brittleness:
- High-Carbon Tool Steel (Flush Cutters): 56 to 58 HRC edge hardness prevents blade denting on unreinforced plastics, though trimming hardened piano wire or music wire will immediately notch the cutting ground.
- Chrome-Vanadium Hex Keys: 50 to 54 HRC provides torsional flexibility without premature rounding of 1.5 mm and 2.0 mm socket engagement flats.
- Spring-Tempered Stainless (Spatula & Scrapers): Annealed 420 stainless steel yields elastic deflection under bed-prying forces without taking a permanent bend.
- HSS Rotary Deburring Blades: High-speed steel rated above 60 HRC retains a razor edge across thousands of abrasive composite filament cycles (carbon fiber and glass-filled nylons).
- Anti-Magnetic Stainless Tweezers: Non-magnetic austenitic steel with black ESD conductive coating prevents sensitive mainboard component discharge and resists solder or molten polymer adhesion.
- Cast Aluminum Caliper Housing: Digital caliper frame with ground stainless measuring surfaces maintains dimensional parallelism across temperature shifts between 18°C and 35°C.
Understanding these material constraints dictates how you deploy the kit on the floor. While the Cr-V hex keys handle routine belt tensioning and frame adjustments with ease, they should not be subjected to pneumatic impact drivers or excessive extension cheater pipes. For high-torque frame assembly, dedicated T-handle drivers remain standard, but for the daily adjustments an FDM operator encounters, this metallurgical balance prevents both fastener stripping and tool fracture.
Detailed Component Analysis: Wear Points and Tolerances
A tool kit is only as reliable as its weakest link under daily bench wear. Breaking down each component in the MatterHackers kit reveals practical design decisions that technicians must navigate during regular machine maintenance.
Precision Flush Cutters
The flush micro-shears included in the kit are ground with a true flush face rather than a standard beveled bypass jaw. This geometry lets you clip support interface trees directly against the printed perimeter without leaving 0.5 mm witness nubs that require secondary sanding. The cutting action shears cleanly through PLA, PETG, and TPU. However, the hinge pin uses a stamped rivet rather than an adjustable screw pivot. After roughly 800 to 1,000 cycles, minor lateral play develops. You must instruct shop hands to use these strictly for thermoplastic filaments, zip-ties, and support structures—never for stripping copper wiring or trimming hardened steel guide rails.
Nozzle Service Tools and Wrenches
Nozzle maintenance is where 3D printing tools face the harshest environment: combined mechanical torque and 250°C to 285°C heat. The kit provides specialized open and socket wrenches tailored to 6 mm (standard MK8/Creality style) and 7 mm (E3D V6, Volcano, and standard industrial blocks) hex geometry. The thin-wall profile of the sockets provides clear access around heater cartridge clamp bolts and fragile glass-bead thermistor wiring. If you have ever attempted replacing a Prusa extruder hotend using a bulky automotive socket, you know that standard sockets crush thermistor insulation and cause ground faults. These slim clearance tools avoid that exact hazard.
Bed Removal Spatula and Scrapers
Removing stubborn PETG or high-temp polycarbonate prints from spring steel or glass beds requires controlled lateral shear rather than vertical prying. The included palette knife features an offset ergonomic handle and an ultra-thin, flexible blade with beveled leading corners. The rounded corners prevent accidental gouges into smooth PEI sheets or textured powder coatings. For an in-depth comparison of specialized bed tools, see our teardown of the BuildTak spatula tool, which follows a similar rigid-versus-flexible engineering tradeoff.
Swivel Deburring Tool
The deburring tool uses a 360-degree free-spinning bearing collar housing an HSS curved blade. When printing parts with wide brims to combat thermal warping, tearing the brim off by hand leaves ragged, razor-sharp edge flash. Swiveling this blade along the bottom perimeter chamfers the edge in a single fluid stroke. The internal blade storage inside the handle is a welcome touch for busy shops where spare blades vanish into workbench drawers.
Precision Tweezers
Equipped with fine curved and straight tips, the tweezers feature an ESD-safe matte coating. Their primary workshop function is nozzle cleaning during preheat sequences. When the hotend reaches 210°C and begins oozing molten polymer before the bed leveling mesh routine, these tweezers allow you to pluck the molten bead away cleanly without transferring heat into your fingers or leaving charred residue on the heat block silicone sock.
Digital Vernier Caliper
The kit includes a 150 mm (6 inch) digital caliper with an LCD readout displaying metric and imperial units down to 0.01 mm (0.0005 in). While it does not replace a calibrated shop-grade Mitutoyo for certified aerospace inspection, its jaw parallelism and zero-point stability are well within the ±0.02 mm threshold needed for verifying filament ovality, calibrating extruder e-steps, and checking printed wall thickness.
Nozzle Cleaning Needles and Pin Vises
The included 0.35 mm and 0.40 mm flexible stainless steel acupuncture needles are dedicated unjamming instruments. Their elongated spring temper allows them to slide through a heated nozzle orifice from below to displace partial clogs or dislodge charred polymer specks without scratching the precision brass orifice land. Used in tandem with a heat gun or brass wire brush, they prevent unnecessary teardowns of the extruder assembly when dealing with contaminated filament batches.
Physics of Failure: Hotend Nozzle Torque & Thread Shear Analysis
The most catastrophic failure in FDM maintenance occurs during nozzle changes. Technicians either under-torque the nozzle, causing molten plastic to leak over the heater block threads, or over-torque the nozzle, stripping the internal threads of the heated aluminum block. Let us examine the mechanics and calculate the exact thread shear stress generated during hot-tightening.
Consider an M6 x 1.0 mm threaded nozzle being torqued into a standard 6061-T6 aluminum heater block at an operating temperature of 250°C. The nominal diameter is d = 6.0 mm (0.006 m), the thread pitch is P = 1.0 mm (0.001 m), and the effective thread engagement length is L_e = 5.0 mm (0.005 m).
The relationship between applied tightening torque T and the resulting axial clamping force (preload) F_i is governed by the standard short-form torque equation:
T = K × d × F_i
Where K is the torque friction coefficient. For unlubricated metal threads operating at elevated temperature (accounting for micro-oxidation and surface galling between brass and aluminum), K ≈ 0.20.
Let us calculate the axial preload generated by a manufacturer-recommended tightening torque of T = 2.5 N·m:
F_i = T / (K × d) = 2.5 / (0.20 × 0.006) = 2.5 / 0.0012 = 2083.3 N
This generates over 2,080 Newtons (roughly 212 kg of clamping force) pushing the nozzle rear face against the heatbreak flange to seal against thermal pressure.
Now, let us calculate the shear stress τ exerted across the internal aluminum threads of the heater block. The cylindrical shear area A_s of the internal M6 thread can be computed from standard thread engagement mechanics:
A_s = π × d × (5/8) × L_e
Plugging in our dimensional parameters:
A_s = π × 6.0 mm × 0.625 × 5.0 mm ≈ 58.90 mm² = 5.89 × 10&supmin;&sup5; m²
The resulting direct shear stress τ acting on the internal threads is:
τ = F_i / A_s = 2083.3 N / 58.90 mm² ≈ 35.37 MPa
Here is where material physics presents the real workshop hazard. At room temperature (20°C), 6061-T6 aluminum exhibits a tensile yield strength of approximately 276 MPa, which corresponds to a nominal shear yield threshold of roughly 159 MPa via von Mises criteria (τ_yield ≈ 0.577 × σ_yield). At 20°C, a shear stress of 35.37 MPa yields a comfortable safety factor of 4.2.
However, when the heater block is soaked at 250°C, the mechanical properties of 6061-T6 aluminum degrade sharply due to over-aging and thermal softening. At 250°C, the tensile yield strength of 6061-T6 drops to approximately 65 MPa. Calculating the elevated-temperature shear yield strength:
τ_yield(250°C) ≈ 0.577 × 65 MPa ≈ 37.51 MPa
Notice how close the values become: applied shear stress is 35.37 MPa, while the thermal yield point is 37.51 MPa. At 2.5 N·m, the aluminum threads operate at 94% of their thermal plastic yield threshold!
If a technician without calibrated tools uses an oversized 120 mm open-end spanner and applies an estimated "snug" torque of 4.0 N·m:
F_i(over-torqued) = 4.0 / (0.20 × 0.006) = 3333.3 N
τ(over-torqued) = 3333.3 N / 58.90 mm² ≈ 56.59 MPa
Because 56.59 MPa significantly exceeds the 37.51 MPa shear limit of hot aluminum, the internal threads strip out instantly, pulling away as a coiled spiral of ruined metal. This calculation highlights why using properly sized compact socket drivers—such as those matched in the MatterHackers kit—is necessary to restrict manual leverage and prevent thread stripping.
Field Maintenance Workflow: Daily Print Clearing to Deep Hotend Overhauls
To maximize tool life and keep parts running smoothly, our technicians follow a standardized four-phase maintenance protocol using the toolkit components.
Phase 1: Safe Print Release and Bed Clearing
Never attack a hot bed with a rigid scraper. Allow the build plate to cool below 35°C so the differential thermal contraction between the plastic part and the spring steel substrate breaks the initial adhesion. If the part remains bonded, gently slide the thin flexible spatula blade under an exterior corner at a shallow 15-degree angle. Push with continuous forward pressure without twisting the blade; twisting concentrates point stress on the spring steel sheet and permanently warps the surface coating.
Phase 2: Brim and Support Post-Processing
Transfer the released model to the cutting mat. Use the swivel deburring tool along the bottom edge, pulling toward your body while allowing the swivel head to track the perimeter contour. For dense organic tree supports, use the flush micro-shears with the flat face oriented directly against the model wall. Snip support branches at the contact nodes rather than ripping them away by hand, which tears crater-shaped divots into the outer shell.
Phase 3: Thermal Nozzle Inspection and Hot-Tightening
When swapping nozzle diameters or clearing an internal carbon buildup, always heat the hotend to 285°C to counteract thermal expansion mismatch between the brass or copper nozzle and the titanium or bi-metal heatbreak. Grip the heater block firmly with an insulated wrench or heat-resistant smooth pliers, taking care not to pinch the thermistor cartridge leads. Thread the new nozzle using the kit's socket driver until it seats against the heatbreak face, then apply a controlled two-finger torque. Inspect the gap between the nozzle hex shoulder and the bottom of the heater block; a visible 0.5 mm gap confirms that the nozzle is sealing against the internal heatbreak tube rather than bottoming out prematurely against the aluminum block.
Phase 4: Axis Alignment and Lead Screw Tramming
Every 250 operating hours, check lead screw play and gantry squareness. Use the kit's 2.5 mm and 3.0 mm hex drivers to verify frame motor mounting bolts. Inspect the Z-axis lead screws for accumulated black brass dust, which indicates misaligned anti-backlash nuts. Wipe the screw threads with a lint-free cloth, apply a thin coat of synthetic PTFE grease, and measure gantry height on both sides of the frame with the digital calipers to ensure dual-Z stepper synchronization within 0.05 mm.
Industrial Specifications Matrix
The following parameters define the structural capacity, tool metallurgy, and functional limits of the MatterHackers Tool Kit:
| Component Tool | Material Grade | Hardness / Spec | Working Clearance | Expected Service Life |
|---|---|---|---|---|
| Precision Flush Cutters | High-Carbon Alloy Steel | 56-58 HRC Edge | 1.75 mm Filament Max | 1,000 Cutting Cycles |
| Nozzle Socket Drivers | Chrome-Vanadium (Cr-V) | 50-52 HRC | 6 mm & 7 mm Hex Flats | 5+ Years Bench Service |
| Flexible Palette Knife | Tempered 420 Stainless | 0.4 mm Blade Thickness | 15° Approach Angle | 3,000 Bed Releases |
| Swivel Deburring Tool | HSS M2 Blade / ABS Handle | 62-64 HRC Blade | 360° Continuous Swivel | 500 Linear Meters Edge |
| Digital Vernier Caliper | Hardened Stainless Steel | ±0.02 mm Accuracy | 0 to 150 mm Range | 10,000 Measurements |
| Hex L-Key Wrench Set | Cr-V with Oxide Finish | 52-54 HRC | 1.5 mm to 6.0 mm Sizes | 2,000 Fastener Cycles |
| Anti-Static Tweezers | Austenitic Non-Magnetic | ESD Surface Coating | 0.2 mm Needle Tips | Indefinite (Avoid Bending) |
| Nozzle Cleaning Needles | Stainless Spring Wire | 0.35 mm & 0.40 mm OD | Standard 0.4 mm Orifices | 50 Clearing Operations |
Troubleshooting Matrix: Common Tool Failures & Bench Fixes
Even well-maintained shop tools experience wear under high-cycle prototyping demands. Here are the standard failure modes encountered with this kit and practical remediation steps:
- Rounded 1.5 mm Hex Key Tip: Small M3 grub screws on extruder gears round out cheap hex tips quickly. Grind 1.5 mm off the blunted tip using a high-speed bench grinder or Dremel cutoff wheel, quenching the steel in water every two seconds to preserve the temper.
- Clogged Acupuncture Needles: Forcing a 0.35 mm needle into a partially cold nozzle bends the thin wire. Heat the hotend to 230°C, dip the needle tip into isopropyl alcohol, and guide it smoothly through the orifice without lateral wiggle.
- Stiff Cutter Return Springs: Dust and filament chips accumulate in the coiled leaf spring mechanism. Flush the pivot joint with solvent degreaser, blow it dry with compressed air, and apply a single drop of light machine oil to the pivot rivet.
- Deburring Blade Chatter: If the rotary blade skips across printed perimeters and leaves a wavy scalloped edge, the cutting speed is too fast or the blade rake angle is too steep. Reduce feed rate and maintain a shallow 30-degree lead angle relative to the part wall.
- Caliper Display Jitter: Erratic numeric readings or loss of zero reference are usually caused by microscopic filament dust settling on the capacitive copper sensor strip beneath the sliding scale. Slide the beam fully open, wipe the scale with a lint-free swab dipped in 99% IPA, and reinstall a fresh SR44 silver oxide cell.
Frequently Asked Questions
Can the included flush cutters trim hardened steel or copper-alloy wire?
No. These cutters feature a high-carbon ground shear edge intended strictly for unreinforced plastics like PLA, PETG, and ABS. Trimming hardened spring steel or electrical wire will immediately notch the cutting edges and ruin the flush alignment.
Why does hot-tightening nozzles require a specific socket over standard open-end wrenches?
Open-end wrenches only make contact with two opposing flats of the brass nozzle, which easily rounds the soft heated metal under 2.5 N·m of torque. A dedicated 6-point thin-wall socket distributes radial clamping forces evenly across all six hex facets while providing clearance around fragile heater and thermistor wiring.
How do the calipers in this kit handle accuracy compared to Mitutoyo workshop references?
The included digital calipers provide reliable accuracy within ±0.02 mm, which is suitable for checking filament diameter, calibration cubes, and mechanical press-fits. High-end Mitutoyo calipers offer tighter absolute repeatability (±0.01 mm) and superior dust sealing, but the kit caliper is more than adequate for daily additive fabrication.
Is the scraper blade safe for smooth PEI and textured powder-coated spring sheets?
Yes, provided you keep the blade angle shallow (under 15 degrees) and avoid gouging the surface with the blade corners. The rounded corner profile on this spatula minimizes the risk of scratching delicate PEI films during part ejection.
Workshop Safety Protocol: Thermal Tightening & Pinch Hazards
Always disconnect power to the heater cartridge before applying metal tools directly adjacent to bare wire leads. Shorting a live 24V heater cartridge circuit against the aluminum heater block with a metal socket wrench can instantly destroy the mainboard MOSFET driver. When servicing hotends at 285°C, wear heat-resistant leather mechanic gloves and maintain a two-finger grip on wrench handles to prevent exceeding the 37.5 MPa thermal shear limit of the softened aluminum threads.
Related Intel
Deploying 3D Printing Tool Sets in Commercial Farms
Standardizing dedicated 3D printing tool sets at each production station reduces machine downtime by 12 minutes per event, saving thousands in farm labor.
Anycubic Tool Set: Real Print Farm Review
The Anycubic Tool Set can reduce hotend disassembly time from 35 to 12 minutes, but the included pliers and wrench have durability issues. The needle cleaners and silicone sock remover are excellent. For a $25-$35 kit it pays for itself in four nozzle swaps.
Anycubic Tool Kit: Buying Guide for Makers
Anycubic Tool Kit: decent entry-level set with essential tools. Weak points: hex driver handles wear out, needles too soft. Brass brush is standout. Worth it for hobbyists, not for heavy daily use.